By:

March 9, 2025

shrimp spring rolls

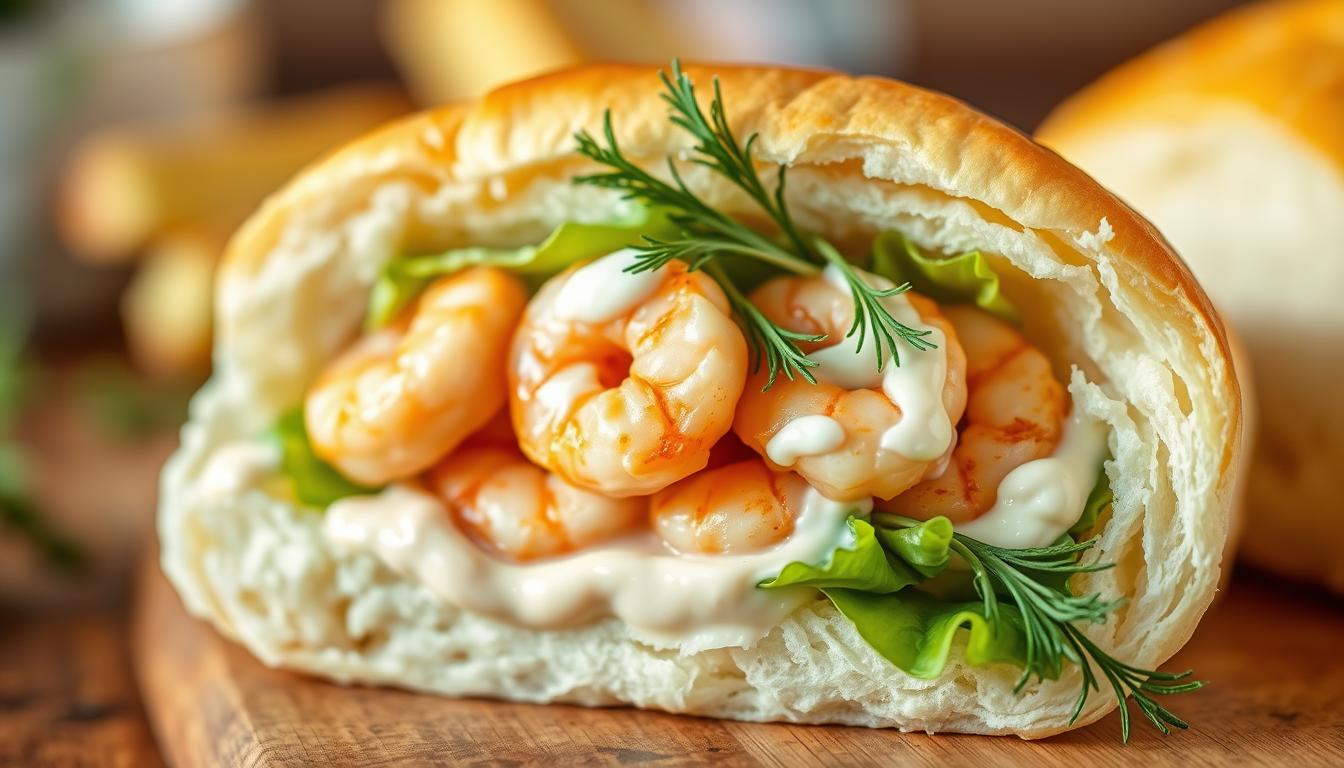
My first taste of Vietnamese cuisine is still vivid in my memory. The shrimp spring rolls, wrapped in thin rice paper, were more than food. They were a journey that changed how I see appetizers.

Shrimp spring rolls are a true reflection of Vietnamese cuisine. They’re full of fresh ingredients and flavors. These rolls mix textures and tastes, taking you to Hanoi’s lively streets.

This guide will show you how to make shrimp spring rolls like a pro. We’ll cover picking the right shrimp and learning to wrap them. You’ll learn to make these tasty appetizers that are healthy and fulfilling.

These shrimp spring rolls are perfect for impressing anyone. They’re great for both experienced cooks and those new to cooking. Get ready to explore the fresh, vibrant tastes of Vietnamese cuisine.

What Are Shrimp Spring Rolls?

Shrimp spring rolls are a key part of Vietnamese cuisine. They mix fresh ingredients into a tasty summer roll recipe. This dish is more than food; it’s a story of flavor and culture.

These rolls are light and show the art of Vietnamese cooking. They have a mix of ingredients that balance textures and tastes.

Origin and Cultural Significance

These rolls come from Vietnam and are a big part of street food culture. Recipes have been passed down through generations, with each area adding its own twist.

  • Developed as a light, refreshing meal
  • Represents the culinary creativity of Vietnamese cuisine
  • Symbolizes community and shared dining experiences

Key Ingredients in Shrimp Spring Rolls

The secret to shrimp spring rolls is their fresh ingredients. Each part is important for a great taste experience.

  1. Shrimp: Medium-sized (21 to 25 count), providing protein and flavor
  2. Rice Paper: 22 cm diameter, translucent wrapper
  3. Vegetables: Crisp carrots and cucumbers
  4. Herbs: Fresh salad greens for added freshness

When making your summer roll, use 3-4 shrimp per roll. It takes about 50 minutes to make 12 rolls. They are light, healthy, and full of flavor.

Pro tip: Soak rice paper sheets individually to prevent sticking and ensure the perfect texture for your Vietnamese cuisine masterpiece.

Benefits of Eating Shrimp

Shrimp and vegetable rolls are a tasty way to eat healthy. They are full of nutrients and flavor. These rolls can help improve your health.

Shrimp is a nutritional powerhouse. It’s small but packs a big punch in your diet. These seafood gems add flavor to shrimp and vegetable rolls.

Nutritional Powerhouse of Shrimp

Shrimp is low in calories but high in nutrients. Here are some key nutritional points:

  • 21 grams of protein per serving
  • Only 208 calories per serving
  • Low in total fat (4.5 grams)
  • 3 grams of dietary fiber
Nutrient Amount per Serving Daily Value
Protein 11g 22%
Vitamin C 34mg 41%
Potassium 639mg 18%
Iron 3mg 17%

Environmental Considerations in Shrimp Sourcing

Your choice of shrimp affects the environment. When picking shrimp, think about these points:

  • Look for sustainably farmed shrimp
  • Choose certifications like Marine Stewardship Council
  • Support responsible fishing practices
  • Opt for local or responsibly imported seafood

By choosing wisely, you can enjoy shrimp and vegetable rolls. You’ll also help protect the ocean.

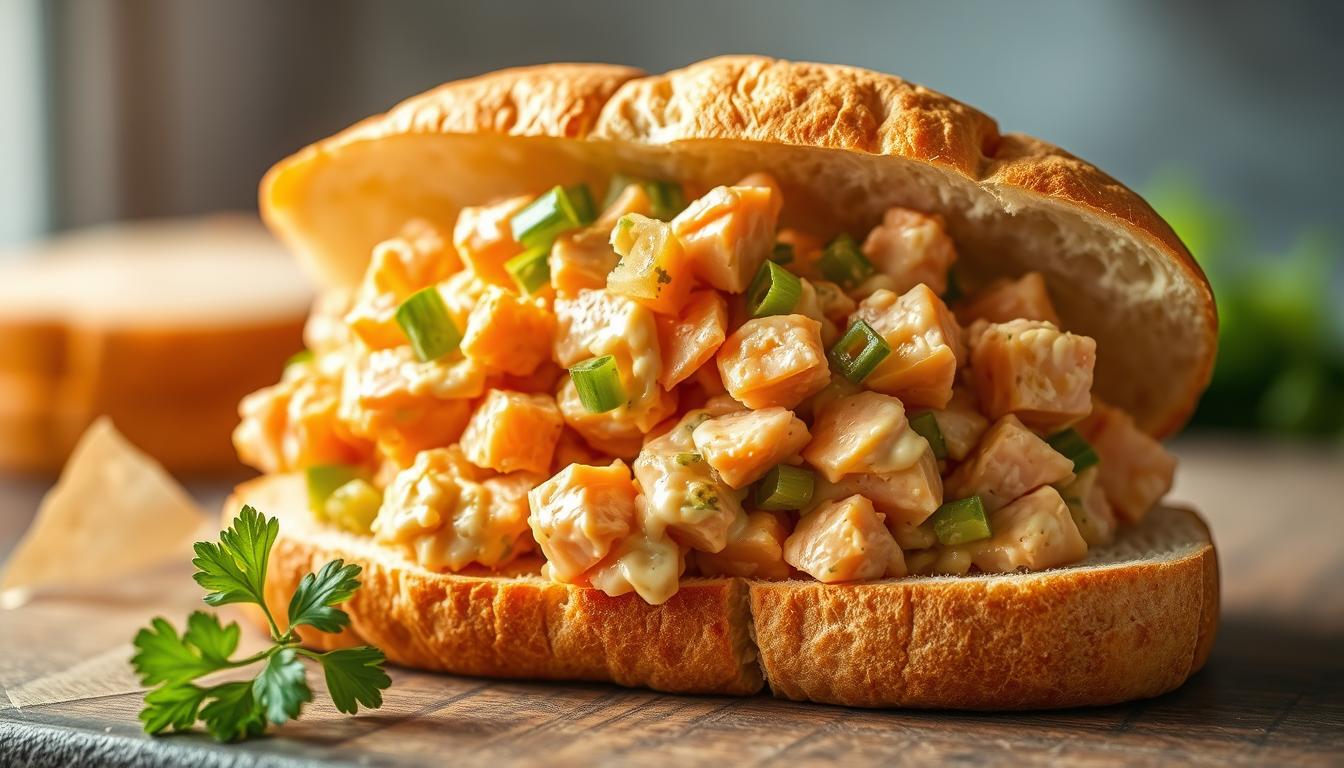
Essential Ingredients for Spring Rolls

Making tasty homemade spring rolls begins with picking the best fresh ingredients. Your shrimp spring rolls will be amazing with top-notch ingredients that add flavor and texture.

The quality of your ingredients is key in making spring rolls. Fresh veggies are essential for a colorful and tasty dish that will wow your guests.

Fresh Vegetables to Include

For the best shrimp spring rolls, mix in a variety of fresh veggies. Here are the best picks:

  • Carrots: Add a sweet crunch and bright orange color
  • Cucumber: Brings coolness and moisture
  • Bell peppers: Add vibrant colors and a hint of sweetness
  • Fresh herbs like mint and cilantro: Boost the flavor
  • Lettuce: Makes a soft base for your rolls

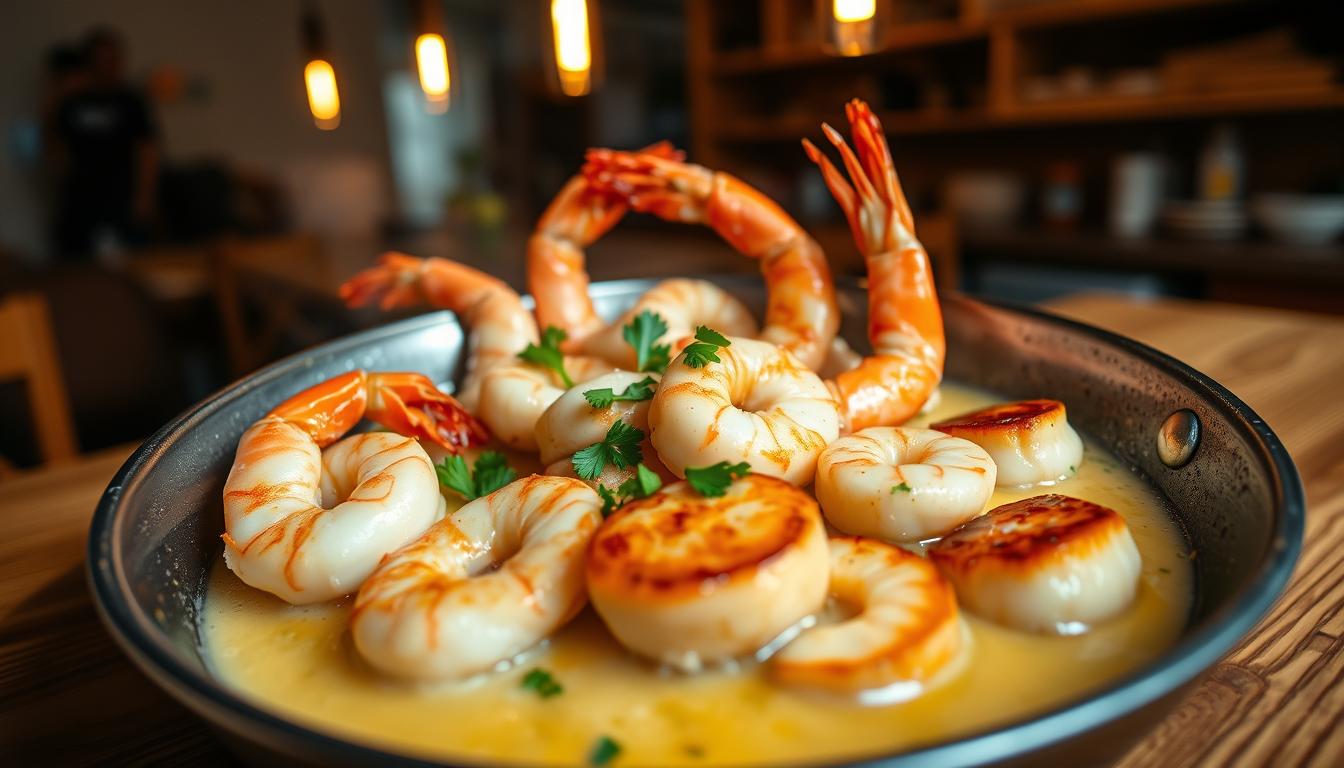
Choosing the Right Shrimp

Choosing the right shrimp is crucial for great homemade spring rolls. Chefs say to use shrimp in the 31/35 size range, about 31 to 35 per pound.

“The secret to great spring rolls is using fresh, high-quality ingredients” – Chef Mai Nguyen

When buying shrimp, look for:

  • Fresh or properly frozen shrimp
  • Peeled and deveined for ease
  • Wild-caught or sustainably farmed
  • Firm, clear appearance

By picking the best ingredients, you’ll make shrimp spring rolls that are more than just food. They’re a special experience.

Preparation Tips for Shrimp Spring Rolls

Making delicious homemade spring rolls needs skill and care. These recipes from Vietnamese cuisine require precision in preparing ingredients and wrapping. Let’s learn how to make perfect shrimp spring rolls that will wow your guests.

How to Prepare Shrimp Properly

Preparing shrimp for your spring rolls involves several key steps:

  • Select medium-sized shrimp (31-40 count per pound)
  • Rinse shrimp thoroughly under cold water
  • Remove shells and devein carefully
  • Steam with shells on to retain moisture
  • Reduce cooking time to prevent rubbery texture

Shrimp Preparation for Spring Rolls

Tips for Wrapping Spring Rolls

Wrapping spring rolls well takes practice and patience. Here are some expert tips:

  1. Use a damp surface for wrapping
  2. Dip rice paper in lukewarm water for 8-10 seconds
  3. Fill only ⅓ of the wrapper with ingredients
  4. Arrange ingredients neatly to prevent tearing
  5. Roll tightly but gently to maintain structural integrity

Your homemade spring rolls will be top-notch if you follow these tips carefully.

Ingredient Quantity Preparation Time
Shrimp 1 pound 5-7 minutes
Rice Paper 6 wrappers 8-10 seconds per sheet
Rice Noodles 3 ounces 2-3 minutes

Remember, practice makes perfect in making these tasty Vietnamese appetizer recipes. Enjoy your cooking journey!

Easy Shrimp Spring Roll Recipe

Making delicious homemade spring rolls is simpler than you think. This recipe will show you how to make tasty shrimp spring rolls. They’re sure to wow your family and friends.

Creating shrimp spring rolls takes some time, but it’s worth it. You’ll need a few ingredients and basic kitchen skills. This will help you make these tasty rolls.

Ingredients You’ll Need

  • 12 large shrimp (size 26/30)
  • 10 sheets of round rice paper
  • 3 cups mixed vegetables (cabbage, carrots, spring lettuce)
  • 1-1/2 teaspoons cilantro per roll
  • 2 heaping tablespoons coconut oil
  • 1/2 teaspoon salt

Step-by-Step Cooking Instructions

  1. Prepare shrimp by steaming to keep them plump and moist
  2. Heat coconut oil and garlic until aromatic
  3. Cook shrimp until they turn plump (approximately 2 minutes)
  4. Cool filling for about 10 minutes
  5. Rehydrate rice paper in cold water for 45 seconds
  6. Carefully wrap ingredients in rice paper
  7. Deep fry at 350°F for approximately 3 minutes

Serving Suggestions

Your homemade shrimp spring rolls are best enjoyed right away. Try them with spicy peanut sauce or sweet chili dip. You can keep them in an airtight container in the fridge for 3-4 days.

“The secret to perfect shrimp spring rolls is patience and fresh ingredients!” – Culinary Expert

Pro tip: Wild-caught Gulf shrimp gives the best taste for your spring rolls. Try different veggies and herbs to make your own version of this classic dish.

Flavorful Dips for Shrimp Spring Rolls

Make your Vietnamese cuisine experience better with tasty dipping sauces. These sauces turn your Asian-inspired appetizer into something special. They add depth and excitement to every bite.

Traditional Vietnamese cuisine has many delicious sauces for spring rolls. These condiments not only make the flavors better but also connect you to the dish’s roots.

Authentic Peanut Sauce Recipe

Try making a creamy peanut sauce that will wow you. Here’s a simple recipe:

  • 1 cup smooth peanut butter
  • 6 cloves of garlic, minced
  • 4 tablespoons sambal garlic chili sauce
  • 4 tablespoons rice wine vinegar
  • 4 tablespoons brown sugar
  • 1/2 cup water

Mix everything until it’s smooth. Pro tip: Store this sauce in an airtight container in the fridge for up to a week.

Zesty Sweet Chili Sauce

Sweet chili sauce is another great choice for your shrimp spring rolls. It’s sweet and spicy, adding a perfect touch.

Sauce Component Quantity Purpose
Rice vinegar 1/4 cup Adds tanginess
Sugar 3 tablespoons Provides sweetness
Red chili flakes 1 teaspoon Introduces heat
Garlic, minced 2 cloves Enhances flavor

Combine the ingredients and simmer until it thickens a bit. Let it cool before you serve it with your spring rolls.

Both sauces are very flexible and can make your appetizer recipe amazing. Try adjusting the amounts to get the flavor just right for you!

Recipes for Variations on Shrimp Spring Rolls

Vietnamese cuisine is all about flexibility in making shrimp and vegetable rolls. Trying out different variations can make your meals more exciting and healthy.

Adding Spicy Elements

Spice enthusiasts can make their shrimp spring rolls even spicier. Here are some ways to add heat:

  • Sprinkle red chili flakes inside the rolls
  • Drizzle sriracha sauce for intense flavor
  • Add minced jalapeños for fresh, sharp heat
  • Include a dash of chili garlic sauce in your dipping mixture

“Spice is the variety of life – especially in Vietnamese cuisine!” – Local Chef Recommendation

Vegetarian Alternatives

Looking for plant-based options? Shrimp and vegetable rolls can be easily changed. Try these protein-rich substitutes:

  • Firm tofu (1 pound) as a direct shrimp replacement
  • Marinated tempeh strips for added texture
  • Grilled portobello mushrooms for a meaty alternative
  • Roasted jackfruit for a unique flavor profile

Experiment with different ingredients to find your favorite spring roll variation. This way, you keep the true spirit of Vietnamese cuisine alive.

Storing and Freezing Shrimp Spring Rolls

Making delicious homemade spring rolls needs careful storage. Your fresh ingredient appetizer deserves to stay tasty and fresh.

Storing Shrimp Spring Rolls

Knowing how to store spring rolls is key. They taste best when eaten within hours. But, you can keep them fresh longer with the right methods.

Refrigerating Leftover Rolls

Keep your spring rolls fresh by following these steps:

  • Use an airtight container with a tight-fitting lid
  • Line the container with slightly moistened paper towels
  • Place spring rolls in a single layer, separating with additional paper towels
  • Refrigerate immediately after preparing

Spring rolls can stay fresh in the fridge for up to 2 days. Remember, rice paper might get a bit hard in the fridge.

Freezing Considerations

Freezing spring rolls is possible, but it’s not the best choice. Freezing can make the rice paper and filling mushy.

If you still want to freeze your rolls, here’s what to do:

  1. Wrap each roll individually in plastic wrap
  2. Place wrapped rolls in a freezer-safe container
  3. Consume within 1 month for best quality
  4. Thaw in the refrigerator overnight before serving

Pro tip: For the best taste, make your spring rolls just before serving. Enjoy them right after you make them.

Frequently Asked Questions About Shrimp Spring Rolls

Preparing shrimp spring rolls can raise several questions for home cooks exploring Vietnamese cuisine. Whether you’re a first-time maker or a seasoned chef, understanding the nuances of these delightful healthy eating options can help you create perfect rolls every time.

Making Spring Rolls Gluten-Free

Creating gluten-free shrimp spring rolls is easier than you might think. Rice paper and rice noodles are naturally gluten-free, making these rolls an excellent option for those with dietary restrictions.

  • Use certified gluten-free rice paper
  • Verify all sauce ingredients are gluten-free
  • Check for potential cross-contamination in preparation areas

Using Cooked Shrimp in Spring Rolls

Good news for busy cooks: you can absolutely use cooked shrimp in your spring rolls. Pre-cooked shrimp can save time without compromising flavor. When selecting shrimp, aim for the 21 to 25 count per pound size for optimal texture.

  • Ensure shrimp are properly cooled before wrapping
  • Pat shrimp dry to prevent soggy spring rolls
  • Season cooked shrimp with fresh herbs for extra flavor

Pro tip: Cooked shrimp can be stored in the refrigerator for up to 3 days, making meal prep a breeze for your Vietnamese cuisine adventure.

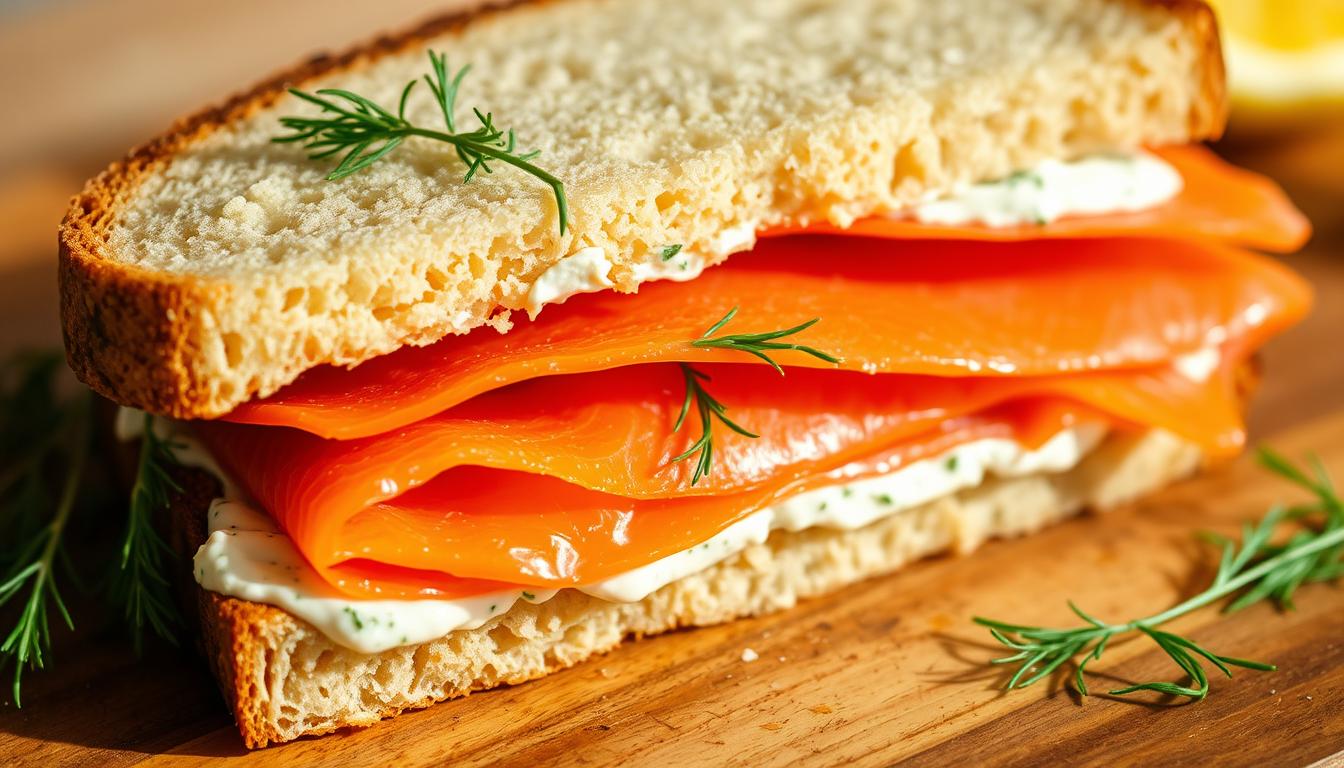
Seasonal Shrimp Spring Roll Ideas

Make your summer rolls special by using fresh, seasonal ingredients. Spring and summer are great times to make your shrimp spring rolls stand out. They become a feast for the senses, celebrating healthy eating and local produce.

Seasonal ingredients can really boost the taste and health of your spring rolls. In spring and summer, your kitchen is a place for creativity. You’ll find lots of fresh herbs and crisp veggies to play with.

Spring Spring Rolls with Fresh Herbs

Make a spring-inspired roll with these herbs:

  • Mint: Adds a refreshing coolness
  • Cilantro: Provides a bright, citrusy note
  • Basil: Introduces a subtle peppery flavor
  • Chives: Brings a mild onion-like essence

Choose herbs that are at their best in spring. Fresh ingredients make all the difference in elevating your summer roll recipe.

Summer Rolls for Outdoor Gatherings

Summer is the time for light, refreshing spring rolls. They’re perfect for picnics and backyard parties. Here are some tips for the ultimate summer rolls:

  • Use lightweight, crisp vegetables like cucumber and radish
  • Opt for smaller, more delicate rice paper wrappers
  • Experiment with citrus-marinated shrimp
Seasonal Ingredient Spring Roll Enhancement
Fresh Mint Cooling flavor profile
Cucumber Added crunch and hydration
Lime-Marinated Shrimp Bright, zesty protein option

By using fresh ingredients and seasonal items, you’ll make your summer rolls a feast. They’ll delight your taste buds and impress your guests.

Tips for Serving Shrimp Spring Rolls at Parties

Make your Asian-inspired appetizer the highlight of any party with smart serving tips. Shrimp spring rolls are a hit, with only 187 calories per roll. They’re not only delicious but also a healthy choice. Presentation is key to making these Vietnamese treats unforgettable.

Start with a beautiful platter. Place 12 spring rolls on a large platter, leaving space for easy picking. Use small white plates or bamboo boards for a nice contrast. Add fresh cilantro and peanut sauce for a pop of color and flavor.

It’s important to control portions. For cocktail parties, offer 2-3 rolls per person. At seated dinners, 1-2 rolls are enough as an appetizer. These rolls are packed with 11 grams of protein, making them a filling start.

Pro tip: For big parties, prep parts ahead but assemble rolls just before guests arrive. This keeps them fresh and lets you enjoy the moment with your guests. Your homemade shrimp spring rolls will impress everyone.

FAQ

Are shrimp spring rolls gluten-free?

Shrimp spring rolls can be gluten-free if you use rice paper wrappers. Make sure to choose gluten-free ingredients. Always check labels for gluten in rice vinegar, soy sauce, and other ingredients. Use tamari or gluten-free alternatives when preparing your rolls.

Can I use cooked shrimp for spring rolls?

Yes, you can use pre-cooked shrimp for spring rolls. For the best taste and texture, choose freshly cooked shrimp. It should be quickly boiled or sautéed. Cool and pat dry the shrimp before adding it to your rolls to prevent them from getting soggy.

How long can I store homemade shrimp spring rolls?

Fresh shrimp spring rolls are best eaten within 24 hours. Store them in an airtight container in the fridge. Wrap each roll in plastic wrap to prevent sticking. Keep them slightly covered but not sealed to avoid condensation.

What are the best vegetables to include in spring rolls?

Choose crisp, fresh vegetables for spring rolls. Use julienned cucumber, carrots, bean sprouts, and leafy herbs like mint, cilantro, and Thai basil. These add crunch, freshness, and flavor to your rolls.

How do I prevent my rice paper from tearing?

To prevent tearing, dip rice paper briefly in warm water until it’s pliable but not too soft. Work on a damp, clean surface. Don’t overload the wrapper. Handle the rice paper gently and avoid stretching it too much during rolling.

Are shrimp spring rolls healthy?

Shrimp spring rolls are a nutritious choice. Shrimp is high in protein, low in calories, and rich in vitamins and minerals. The fresh vegetables and herbs add more nutrients, making these rolls a light, healthy option.

Can I make vegetarian spring rolls?

Absolutely! Replace shrimp with tofu, tempeh, or more vegetables like avocado, grilled mushrooms, or marinated plant-based proteins. Keep the traditional herbs and vegetables to maintain the authentic spring roll flavor.

What’s the best dipping sauce for shrimp spring rolls?

Traditional Vietnamese spring rolls pair well with peanut sauce or sweet chili sauce. A classic nuoc cham (Vietnamese dipping sauce) made with fish sauce, lime juice, sugar, and chili is also great for shrimp spring rolls.

By:

March 9, 2025

how to make classic shrimp-roll

Summer memories come alive with the first bite of a shrimp roll. Growing up near the New England coast, seafood was more than food—it was an experience. Today, I’m excited to share a shrimp roll recipe that brings restaurant-quality flavor to your kitchen.

Imagine making the best shrimp roll without leaving home. This classic dish is surprisingly easy to make. With a few fresh ingredients and simple steps, you’ll turn ordinary shrimp into a delicious meal for 6 to 8 people.

Our shrimp roll recipe is all about simplicity and flavor. It’s perfect for summer gatherings or a quick weeknight dinner. We’ll show you how to pick the right shrimp, make a creamy dressing, and assemble a roll that rivals any coastal restaurant.

Get ready to take your home cooking to the next level with this classic shrimp roll recipe. By the end of this guide, you’ll be making a seafood dish that will impress everyone.

What is a Shrimp Roll?

A shrimp roll is a tasty seafood sandwich loved by many. It’s made from simple ingredients that turn into a delicious treat. It’s easy to make and very satisfying.

At its heart, a shrimp roll is a tasty alternative to lobster rolls. It’s filled with juicy shrimp and creamy dressing. These rolls are a favorite in many coastal restaurants.

A Brief History of Shrimp Rolls

Shrimp rolls started in coastal areas where seafood was cheap and plentiful. Fishermen and cooks made this sandwich to enjoy fresh seafood easily.

  • Originated in coastal fishing communities
  • Developed as a more affordable seafood sandwich option
  • Evolved from traditional lobster roll recipes

Regional Variations of Shrimp Rolls

Shrimp rolls vary by region, each with its own flavors. From spicy Southern to herb-rich New England, they show off local tastes.

Region Unique Characteristic
New England Herb-heavy, butter-toasted bun
Southern Coast Spicy seasoning, Cajun-inspired
Pacific Northwest Fresh dill, lighter mayo dressing

Whether you love seafood or just enjoy good sandwiches, shrimp rolls are a treat. They offer a fun and tasty experience for everyone.

Ingredients You’ll Need for Shrimp Rolls

Making tasty shrimp rolls begins with the right ingredients. The secret to a great seafood dish is using top-notch parts. These parts should blend well to make a meal you’ll remember.

  • Fresh Shrimp: Choose shell-on, wild-caught shrimp
  • Mayonnaise or Greek yogurt
  • Fresh herbs (dill, chives)
  • Lemon juice
  • Celery
  • Split-top hot dog buns or brioche rolls

Fresh Shrimp Selection Tips

Picking the right shrimp is key for a great roll. Go for large, fresh shrimp with a firm feel and a clean smell. Wild-caught shrimp taste better and are better for the planet.

Shrimp Type Best Cooking Temperature Cooking Time
Large Wild-Caught Shrimp 170˚F 2-3 minutes

Key Seasoning and Dressing Ingredients

The flavor of your shrimp roll comes from the right mix of seasonings. Mix fresh herbs, lemon zest, and quality mayonnaise for a dish that’s truly special.

  • Salt and freshly ground black pepper
  • Chopped fresh parsley
  • Lemon zest
  • Optional: Dash of hot sauce for extra kick

Pro tip: Shock your cooked shrimp in ice water. This keeps them tender and makes your shrimp rolls irresistible.

Preparing the Shrimp

Starting a great shrimp roll recipe means picking and prepping top-notch shrimp. The way you cook them greatly affects the taste and feel of your dish.

Cooking Methods for Shrimp

You have two main ways to cook shrimp for your rolls:

  • Boiling: Quick and easy method
  • Grilling: Adds smoky flavor complexity

Boiling Technique

To boil shrimp for your recipe, follow these steps:

  1. Bring salted water to a rolling boil
  2. Add 1 pound of fresh shrimp
  3. Cook for 2-3 minutes until pink and opaque
  4. Immediately transfer to ice water to stop cooking

Grilling Alternative

Grilling gives a tasty twist to making shrimp rolls with more flavor:

  1. Preheat grill to medium-high heat
  2. Brush shrimp with 2 tablespoons of tamari
  3. Grill 1-2 minutes per side
  4. Squeeze fresh lime juice over cooked shrimp

Chilling and Seasoning

After cooking, chill your shrimp well before mixing with mayonnaise. This keeps the dressing from getting watery and keeps the shrimp rolls just right.

Pro tip: Season shrimp with a pinch of sea salt and optional sriracha for extra kick!

Making the Creamy Mayo Dressing

Creating the perfect creamy dressing is key for the best shrimp roll recipe. The right mix of ingredients turns a simple shrimp roll into a dish that wows everyone.

The base of a great shrimp roll dressing starts with top-notch mayonnaise. For the best taste, mix ingredients that go well with the shrimp.

Essential Herbs for Flavor

Fresh herbs are the secret to your shrimp roll recipe. Pick a mix of herbs that boost the flavor:

  • Fresh dill – 1 tablespoon, adds a bright, tangy note
  • Fresh parsley – 1 tablespoon, gives a clean, fresh taste
  • Chives – Finely chopped, for a mild onion-like flavor

Combining Ingredients for Optimal Taste

To make the ultimate creamy dressing for your best shrimp roll, use these exact amounts:

  • Mayonnaise: ½ cup
  • Fresh lemon juice: 2 tablespoons
  • Lemon zest: 1 tablespoon
  • Dijon mustard: 1 teaspoon
  • Kosher salt: ¼ teaspoon
  • Black pepper: ¼ teaspoon

Pro tip: Mix the dressing ingredients separately before combining with shrimp to ensure even flavor distribution.

For a lighter version, swap half the mayonnaise with Greek yogurt. This change cuts calories but keeps the dressing creamy, perfect with shrimp.

Chill the dressing for at least 30 minutes before serving. This lets the flavors mix well, making the shrimp roll even tastier.

Assembling Your Shrimp Rolls

Making a shrimp roll is an art that needs careful prep and tasty ingredients. The assembly is key to getting that classic taste. Your shrimp roll recipe will shine with the right steps and focus.

Selecting the Perfect Bread

The base of a great shrimp roll is the bread. You can choose from:

  • Split-top hot dog buns
  • Brioche rolls
  • Soft New England-style rolls

For the best shrimp roll, split-top brioche buns are top choice. Toast the buns lightly with butter for a crispy, golden outside.

Portioning Your Shrimp Mixture

Getting the shrimp-to-bread ratio right is crucial. Here’s how:

  1. Use 3-4 medium shrimp per roll
  2. Chop shrimp into bite-sized pieces for easier eating
  3. Aim for a generous but not overwhelming portion

Pro tip: Start with crisp lettuce as a base to keep the bread dry. This simple trick keeps your shrimp roll perfect from start to finish.

The secret to an amazing shrimp roll is balance – between bread, shrimp, and seasonings.

Garnishing Your Shrimp Rolls

Creating the best shrimp roll is not just about the recipe. It’s also about how you present it. Adding creative garnishes can turn a simple dish into a fancy restaurant meal.

Garnished Shrimp Rolls

When making your shrimp roll, think about these fun garnishing ideas. They will make your dish truly special:

Fresh Vegetables and Add-Ons

  • Sprinkle fresh microgreens for a delicate, peppery touch
  • Add sliced radishes for a crisp, crunchy texture
  • Garnish with thinly sliced cucumber for a refreshing element
  • Include pickled red onions for a tangy contrast

Creative Presentation Ideas

Make your shrimp rolls look amazing with these presentation tips:

  1. Arrange rolls on a wooden cutting board for a rustic look
  2. Use fresh herb sprigs as decorative elements
  3. Serve with small ramekins of complementary dipping sauces
  4. Garnish with lemon wedges for a bright, citrusy accent

Remember, how your dish looks is just as important as how it tastes. Your guests will love the extra effort you put into making it look great.

Common Mistakes to Avoid

Making the best shrimp roll needs focus and avoiding common errors. Knowing these mistakes helps you get a tasty dish.

Cooking shrimp right is an art that needs care. Here are key mistakes to watch out for:

Overcooking the Shrimp: A Texture Disaster

Overcooking shrimp is a big mistake for home cooks. Overcooked shrimp become rubbery and lose flavor. Here’s how to cook shrimp right:

  • Cook shrimp for 2-3 minutes in boiling water
  • Watch for the color change to pink
  • Remove shrimp immediately when they curl into a “C” shape
  • Aim for a cooking temperature between 375-400°F

Skimping on the Dressing: Flavor is Key

Not using enough dressing is another mistake. The right amount of creamy mayo-based dressing keeps your shrimp salad moist and flavorful.

  • Use approximately 2-3 tablespoons of dressing per cup of shrimp
  • Mix gently to prevent breaking the shrimp
  • Season with fresh herbs for added complexity

By avoiding these common mistakes, you’ll be well on your way to mastering how to make shrimp roll that impresses family and friends.

Pairing Suggestions for Your Shrimp Rolls

Creating the perfect meal is more than just making tasty shrimp rolls. The right sides and drinks can make your meal unforgettable. It turns a simple dish into a special culinary journey.

Shrimp Roll Pairings

Side Dishes that Complement Shrimp Rolls

Here are some tasty side dishes to go with your shrimp rolls:

  • Classic Coleslaw: A crisp and tangy match for seafood
  • Grilled Corn on the Cob: A summer favorite that pairs well with shrimp
  • Roasted Asparagus: Adds a sophisticated vegetable touch
  • Potato Chips: For a satisfying crunch
  • Mixed Green Salad: A light and refreshing choice

Beverage Pairings to Enhance Your Meal

Choosing the right drink can make your shrimp roll meal even better. Here are some top picks:

  • Crisp White Wines: Sauvignon Blanc or Pinot Grigio
  • Light Beers: Pilsner or wheat beer
  • Refreshing Iced Tea
  • Citrus Lemonade
  • Sparkling Water with Lemon

By picking the right sides and drinks, you’ll make a balanced meal. It will showcase the shrimp rolls’ flavors. Try different pairings to find your favorite!

Variations on the Classic Shrimp Roll

Exploring different shrimp roll variations can turn your traditional recipe into a fun adventure. You can spice up your dish or make it lighter. There are many ways to make the classic shrimp roll recipe your own.

Creativity is key when trying new shrimp roll recipes. Different tastes and dietary needs can lead to unique twists on this favorite dish.

Spicy Shrimp Roll: Adding Heat

For those who enjoy a spicy kick, here are some exciting variations:

  • Add sriracha directly to the mayo dressing
  • Sprinkle cayenne pepper into the shrimp mixture
  • Incorporate finely chopped jalapenos for extra heat

Healthy Alternatives for a Lighter Dish

For those watching their calories, here are some modified shrimp roll recipes:

  • Replace mayonnaise with Greek yogurt
  • Use avocado as a creamy base
  • Add extra vegetables for a nutritional boost
Variation Type Key Ingredients Calories per Roll
Classic Shrimp Roll Mayo, Shrimp, Bread 401 kcal
Spicy Shrimp Roll Sriracha, Shrimp, Jalapenos 415 kcal
Healthy Shrimp Roll Greek Yogurt, Shrimp, Avocado 376 kcal

Get creative with your shrimp roll recipe. Discover flavors that excite your taste buds and meet your nutritional goals!

Storing and Reheating Shrimp Rolls

Keeping your homemade shrimp rolls fresh is key. Knowing how to store and reheat them is important. This way, you can enjoy them for longer without losing their taste.

Best Practices for Keeping Shrimp Fresh

Here are some tips for storing your shrimp rolls:

  • Store shrimp mixture separately from bread to prevent sogginess
  • Use airtight containers for maximum freshness
  • Refrigerate immediately after preparation
  • Consume within 3-4 days for optimal taste and safety

Reheating Tips Without Compromising Flavor

Reheating shrimp rolls can be tricky. But, these methods will help keep their taste:

  1. Gently warm in the oven at low temperature (around 250°F)
  2. Use microwave sparingly – 10-15 seconds maximum
  3. Avoid direct high heat to prevent rubbery shrimp texture

Pro tip: For the best experience, assemble your shrimp rolls just before serving to keep the bread crisp and fresh.

Food safety is crucial when handling seafood. Always ensure your shrimp reaches a safe internal temperature and never leave seafood at room temperature for more than 2 hours.

Conclusion: Enjoy Your Homemade Shrimp Rolls!

Your journey to making the best shrimp roll recipe is just starting. You now have the skills to make delicious shrimp rolls that are as good as those in restaurants. This dish is amazing because you can make it your own.

By trying out different ingredients and techniques, you can create your own special shrimp roll. You can stick to the classic recipe or try new flavors. The basics you’ve learned will help you be creative in the kitchen.

Experiment with Passion

Don’t be shy to add your own twist to the shrimp roll recipe. Try different herbs, change the seasoning, or use local ingredients that you like. Every time you try something new, you get closer to making your perfect shrimp roll.

Share Your Culinary Adventures

We encourage you to share your shrimp roll stories with other food lovers. Your creative ideas and personal touches might inspire others to try new things in the kitchen. Remember, the best recipes come from passion, creativity, and a love for exploring new flavors.

FAQ

What makes a shrimp roll different from a lobster roll?

Shrimp rolls are more affordable and versatile than lobster rolls. They use chopped shrimp and a creamy dressing with herbs. This makes them easier to make at home.

How do I choose the best shrimp for my rolls?

Choose fresh or frozen shrimp that’s firm and smells clean. Wild-caught shrimp are best. Use medium to large shrimp, shell-free and deveined. Buy from a trusted seafood market or store.

Can I make shrimp rolls ahead of time?

Prepare the shrimp mixture up to 24 hours in advance. Store it in the fridge. But assemble the rolls just before serving to keep the bread fresh.

Are there gluten-free options for shrimp rolls?

Yes! Use gluten-free bread or lettuce wraps. Make sure mayonnaise is gluten-free too. Corn tortillas or gluten-free slider rolls are great alternatives.

How long can I store leftover shrimp rolls?

Store unassembled shrimp mixture in the fridge for 1-2 days. Keep it in an airtight container at 40°F or below. Discard if it smells off or looks unusual.

What are some quick variations I can try with my shrimp rolls?

Try adding Old Bay, jalapeños, or fresh herbs. Use Greek yogurt or avocado for dressing. Explore international flavors with curry, lime zest, or sriracha.

Can I use frozen shrimp for my rolls?

Yes, frozen shrimp are great. Thaw them in the fridge, drain, and pat dry before cooking. They’re often fresher than “fresh” seafood.

What side dishes pair well with shrimp rolls?

Try coleslaw, potato chips, corn on the cob, or a light salad. For drinks, choose crisp white wines, light beers, or iced tea.

By:

March 7, 2025

shrimp and scallop scampi

Looking for a quick, elegant meal that impresses? Shrimp and scallop scampi is your answer. It changed my weeknight dinners forever.

Imagine a delicious seafood dish ready in 30 minutes, like a restaurant’s. Your guests will be amazed by your shrimp and scallop scampi.

This recipe is more than a meal. It’s a celebration of fresh seafood and vibrant flavors. You’ll create a memorable dinner that’s both sophisticated and easy to make.

  •  

Introduction to Shrimp and Scallop Scampi

Explore the world of shrimp and scallop scampi, a dish that turns simple seafood into a feast. It’s more than a meal; it’s a celebration of flavors from Italy’s rich culinary traditions.

What Makes This Dish Special?

Shrimp and scallop scampi is special for many reasons:

  • It’s quick to make (just 30 minutes)
  • It’s full of rich, complex flavors
  • It’s perfect for both casual and fancy meals
  • It’s packed with protein

Your homemade scampi sauce will make these seafood stars shine. The mix of fresh shrimp and tender scallops is a taste sensation.

The Origin of Scampi

The word “scampi” has a rich history in Mediterranean cuisine. It started with a small lobster but now means a beloved seafood dish.

“Scampi is not just a dish, it’s a culinary journey through Italian coastal traditions.”

Seafood Type Calories per 3 oz Protein Content
Shrimp 84 18 grams
Scallops 94 15 grams

The beauty of shrimp and scallop scampi is its simplicity. A homemade scampi sauce with garlic, butter, white wine, and lemon turns these ingredients into a dish fit for a restaurant, made right in your kitchen.

Essential Ingredients for Shrimp and Scallop Scampi

Creating the perfect seafood dinner recipe starts with selecting high-quality ingredients. Your best scallop scampi recipe depends on choosing the right components. These will make the dish go from ordinary to extraordinary.

Fresh Shrimp vs. Frozen Shrimp

When preparing your seafood dinner recipe, you’ll need to decide between fresh and frozen shrimp. Experts say extra-large or jumbo shrimp give the best flavor. Individually Quick Frozen (IQF) shrimp are convenient and still high in quality.

  • Fresh shrimp: Best when purchased same-day from a reputable fishmonger
  • Frozen shrimp: Ideal for convenience and year-round availability
  • Recommended size: Medium (41-50 shrimp per pound)

Choosing the Right Scallops

For the best scallop scampi recipe, choose large sea scallops. Look for scallops that are:

  1. Firm and slightly translucent
  2. Free from strong fishy odors
  3. Uniform in color (creamy white to light beige)

Pro tip: Dry-packed scallops work best for achieving a perfect golden sear.

Herbs and Seasonings You’ll Need

Your ingredient list for an exceptional seafood dinner recipe should include:

  • 9 garlic cloves (5 finely chopped, 4 grated)
  • 7 tablespoons butter
  • 1/2 cup panko bread crumbs
  • 1/2 teaspoon crushed red pepper flakes
  • 1/2 cup dry white wine
  • Juice of 1 lemon
  • 1/3 cup fresh parsley
  • 1 tablespoon olive oil

These carefully selected ingredients will transform your scampi into a restaurant-quality dish. It will impress even the most discerning seafood lovers.

Kitchen Tools You’ll Need

Preparing a tasty shrimp and scallop pasta needs the right kitchen tools. Whether you’re a pro chef or a home cook, the right tools make cooking fun and easy.

Essential Cookware for Perfect Seafood Dishes

For shrimp and scallop pasta, you’ll need a few key pieces:

  • Large non-stick skillet or sauté pan
  • Heavy-bottomed stainless steel pan
  • Large pasta pot with strainer
  • Baking sheet for prepping ingredients

Helpful Preparation Gadgets

Here are some tools to make cooking easier:

  1. Sharp kitchen knife for precise cutting
  2. Garlic press for quick mincing
  3. Seafood deveining tool
  4. Citrus juicer for fresh lemon flavor
Tool Category Recommended Items Purpose
Cutting Tools Chef’s knife Precise seafood preparation
Cooking Surfaces Non-stick skillet Sautéing shrimp and scallops
Preparation Tools Seafood deveiner Clean and prepare seafood

Pro tip: Invest in quality tools that will make your shrimp scampi preparation easier and more enjoyable.

“The right tools can transform cooking from a chore to a delightful experience” – Culinary Expert

Step-by-Step Cooking Instructions

Making an easy scampi recipe needs precision and skill. This guide will help you make a tasty shrimp and scallop scampi. It’s impressive yet simple.

Shrimp and Scallop Scampi Cooking Process

Preparing the Seafood

Begin by carefully preparing your seafood. For the best shrimp and scallop scampi, follow these steps:

  • Rinse shrimp and scallops under cold water
  • Pat seafood completely dry with paper towels
  • Remove shrimp shells, leaving tails intact if desired
  • Devein shrimp carefully
  • Ensure scallops are free from any side muscle

Sautéing the Aromatics

The secret to amazing scampi is in the sautéed aromatics. Heat olive oil in a large skillet over medium heat. Add minced garlic and sauté for precisely 30-45 seconds. Be careful not to brown, as it can make the taste bitter.

“The key to great scampi is treating your ingredients with respect and precision.”

Combining Ingredients for Flavor

Make a flavorful sauce by adding these ingredients in order:

  1. Melt butter in the pan
  2. Sprinkle red pepper flakes
  3. Pour in white wine
  4. Squeeze fresh lemon juice
  5. Let sauce simmer until slightly thickened
Ingredient Quantity Cooking Time
Shrimp 1 pound (16-20 count) 2-3 minutes per side
Scallops 1 pound (10-20 count) 2-3 minutes per side
Garlic 3-4 cloves, minced 30-45 seconds
Butter 2 tablespoons Melt until foamy

Your easy scampi recipe is now ready! Serve it immediately over pasta or with crusty bread. This way, you can enjoy the delicious sauce.

Tips for Perfectly Cooked Seafood

Preparing a delicious seafood dish like scallop scampi needs precision and skill. Cooking seafood can be tricky. But with the right techniques, you’ll master the best scallop scampi recipe in no time.

Avoiding Mushy Scallops

The key to perfectly cooked scallops is avoiding moisture. Before cooking, follow these essential steps:

  • Pat scallops completely dry with paper towels
  • Remove any side muscle attached to the scallop
  • Use a hot, dry pan for ideal searing

Pro tip: Excess moisture prevents the golden-brown crust that makes scallops irresistible.

Timing Your Cooking Right

Cooking time is crucial for maintaining the delicate texture of seafood. For the best scallop scampi recipe, follow these precise cooking guidelines:

  1. Sear scallops for 1-2 minutes on each side
  2. Look for a golden-brown exterior
  3. Ensure internal temperature reaches 145°F

For shrimp, cook 2-3 minutes per side until they turn pink and curl slightly. Remember, overcooking leads to rubbery, tough seafood.

The secret to a perfect delicious seafood dish is knowing exactly when to remove it from heat.

Practice makes perfect. With these tips, you’ll create restaurant-quality seafood every time!

Classic Shrimp and Scallop Scampi Recipe

Get ready to make a seafood dinner that will wow your family and friends. This shrimp and scallop scampi is a tasty dish. It mixes juicy seafood with a rich, flavorful sauce.

  • 1 pound extra large (16/20) shrimp, peeled and deveined
  • 1 pound large sea scallops
  • 2 tablespoons extra virgin olive oil
  • 2 tablespoons butter
  • 4 cloves garlic, minced
  • 1/4 cup fresh parsley, chopped
  • 1/2 cup white wine (Chardonnay or Pinot Grigio)
  • Freshly ground black pepper
  • Salt to taste

Detailed Cooking Method

Making the perfect shrimp and scallop scampi needs careful timing and technique. Start by drying your seafood with paper towels. This helps get a beautiful golden-brown sear on both shrimp and scallops.

  1. Heat olive oil in a large skillet over medium-high heat
  2. Sauté shrimp for 2-3 minutes until pink and curled
  3. Remove shrimp and set aside
  4. Cook scallops for 2-3 minutes per side until golden brown
  5. Add garlic and butter to the pan, creating a fragrant sauce
  6. Deglaze with white wine and simmer for 5-7 minutes
  7. Return seafood to the pan and toss with fresh parsley

Serving Suggestions

Serve your shrimp and scallop scampi over al dente linguine or with crusty bread. This lets you soak up the delicious sauce. A crisp glass of Chardonnay goes well with it. For a full meal, add roasted zucchini or baked broccolini.

Pro tip: Store leftovers in an airtight container in the fridge for up to 3 days.

Variations on the Traditional Recipe

Try new twists on the classic shrimp and scallop pasta for a fun cooking journey. It’s great to make your favorite dishes your own. This recipe is perfect for adding your own special touches.

Adding Vegetables for Extra Flavor

Make your shrimp and scallop pasta even better by adding colorful veggies. These additions bring out the seafood’s taste:

  • Cherry tomatoes – burst with sweet-tangy flavor when quickly sautéed
  • Tender asparagus spears – add a crisp, green element
  • Wilted baby spinach – provides nutritional boost and color
  • Roasted bell peppers – introduce smoky undertones

Alternative Protein Options

Shrimp and scallops are great, but you can also try other proteins. Here are some ideas:

  • Tender chicken breast – for a lighter protein option
  • Mixed seafood medley – combining crab, shrimp, and mussels
  • Seared cod or halibut – white fish works beautifully
  • Crispy tofu cubes – perfect for vegetarian versions

The secret to a great variation is keeping the dish’s core flavor. But also, let your creativity shine through.

Pairing Your Scampi Dish

Creating a perfect dining experience is more than just the main course. The right wine and side dishes can make your seafood dinner unforgettable. They delight all your senses.

Best Wines to Complement Scampi

Finding the perfect wine can take your shrimp and scallop scampi to new heights. Look for a wine that matches the dish’s rich, garlicky flavors.

  • Pinot Grigio: A crisp, light white wine that pairs beautifully with seafood
  • Sauvignon Blanc: Offers bright, citrusy notes that complement the scampi
  • Chardonnay: A fuller-bodied white that stands up to the dish’s buttery sauce

Choose a wine under $20. It should highlight the seafood’s delicate flavors.

Suggested Side Dishes

Enhance your scampi with side dishes that match its flavors and textures:

Side Dish Flavor Profile Preparation Time
Fresh Green Salad Light and Zesty 10 minutes
Lemon Pasta Citrusy and Rich 15 minutes
Steamed Vegetables Healthy and Fresh 8 minutes
Garlic Bread Warm and Savory 12 minutes

Shrimp and Scallop Scampi Pairing

Pro tip: Pick sides that enhance the garlic and butter of your scampi. A light, fresh side can balance the dish’s richness.

Common Mistakes to Avoid

Making the best scallop scampi recipe needs focus and avoiding common errors. Many home cooks face mistakes that can ruin a dish. Knowing these mistakes helps you cook like a pro.

When cooking seafood, some mistakes can hurt your dish’s quality. Let’s look at the most common errors and how to avoid them:

Improper Seafood Preparation

  • Never skip thoroughly drying your seafood before cooking
  • Pat scallops and shrimp completely dry with paper towels
  • Moisture prevents proper searing and reduces flavor development

Thawing Seafood Correctly

Proper thawing is key for seafood quality. Avoid these mistakes:

  1. Never thaw seafood at room temperature
  2. Use refrigerator thawing for best results
  3. Thaw seafood in a sealed container to prevent bacterial growth

Avoiding Overcooking

Overcooking can ruin your shrimp and scallop scampi. Seafood cooks fast and can become tough. Follow these tips:

  • Cook scallops for approximately 90 seconds per side
  • Shrimp typically need 2-3 minutes total cooking time
  • Watch for color changes – shrimp should turn pink, scallops golden brown

Avoiding these mistakes will help you make a top-notch shrimp and scallop scampi. It will impress your family and friends.

Storage and Leftover Tips

Keeping your shrimp and scallop scampi fresh is key. The right storage and reheating can make leftovers just as tasty as the first time.

Proper Leftover Storage

Here’s how to store your scampi leftovers:

  • Use an airtight container
  • Refrigerate within 2 hours of cooking
  • Keep it for 2 to 3 days max
  • Don’t let seafood sit at room temperature

Reheating Your Seafood Dish

Reheating scampi needs care to keep it tender and flavorful:

  1. Take seafood out of the fridge 10-15 minutes before
  2. Stovetop reheating is best
  3. Add a splash of broth or water to avoid dryness
  4. Heat on low to medium, stir often

Tips for Maintaining Quality

To keep your scampi leftovers tasty:

  • Steer clear of microwaving, it can overcook
  • Check shrimp curl into a C or U shape
  • Scallops should be golden and slightly firm
  • Eat reheated seafood within 24 hours

Follow these tips to enjoy your seafood dinner recipe again and again. It will taste just as good as the first time.

Final Thoughts on Making Shrimp and Scallop Scampi

Making this tasty seafood dish is simpler than you think. It only takes 30 minutes to prepare. You can make a meal for up to 8 people with just a few ingredients. This easy recipe brings restaurant flavors to your kitchen.

Trying out shrimp and scallop scampi is more than just cooking. It’s a chance to try new seafood, learn classic cooking methods, and wow your loved ones. You can also customize the recipe to make it your own.

Why You’ll Love This Dish

This scampi is loved for its simple yet bold flavors. It uses fresh sea scallops, juicy shrimp, and fragrant garlic. The result is a dish that’s both fancy and easy to make.

The mix of tender seafood and a tangy sauce is unforgettable. It makes every meal special.

Encouragement to Get Cooking

It’s time to start cooking! Get your fresh ingredients ready and follow the steps. This scampi recipe is perfect for any occasion. It’s sure to make everyone want more.

FAQ

How long does it take to make shrimp and scallop scampi?

This seafood dish is ready in just 30 minutes. It’s perfect for quick dinners or special meals. The recipe is easy and quick, making it a restaurant-quality meal in no time.

What are the key ingredients for a traditional scampi sauce?

Classic scampi sauce has garlic, butter, white wine, and lemon juice. These ingredients make a rich, flavorful sauce. It perfectly complements the seafood, giving it a tangy, buttery taste.

Can I use frozen seafood for this recipe?

Yes, frozen shrimp and scallops work too. Just thaw and pat them dry before cooking. Fresh seafood is best, but frozen can be good if thawed right. Make sure to dry them well for a good sear and to avoid a watery sauce.

What wine pairs best with shrimp and scallop scampi?

Pinot Grigio or Sauvignon Blanc are great choices. They match the garlic and lemon in the sauce. These wines add a refreshing touch to the rich seafood.

How do I prevent overcooking the seafood?

Cook shrimp and scallops quickly over high heat. Shrimp should turn pink and curl. Scallops should be golden outside but tender inside. Cooking time is 2-3 minutes per side, depending on size.

Can I make this dish gluten-free?

Absolutely! Use gluten-free pasta or serve over rice or zucchini noodles. Make sure all ingredients, like white wine, are gluten-free. You’ll have a tasty gluten-free seafood dish.

How long can I store leftover scampi?

Store leftover scampi in an airtight container in the fridge for up to 2 days. For best taste, eat within 24 hours. Reheat gently to avoid overcooking the seafood.

Can I add vegetables to this recipe?

Yes! Add cherry tomatoes, spinach, or asparagus for extra nutrition and flavor. Add them towards the end to keep their texture and freshness.

  •  

By:

March 7, 2025

canned salmon sandwich

Imagine a lunch that’s quick, delicious, and full of nutrition. Your canned salmon sandwich is about to be the highlight of your day. In just 15 minutes, you can make a protein-rich, tasty salmon salad that will keep you full for hours.

Busy professionals and health-conscious eaters, this easy lunch idea is for you. With about 25 grams of protein per serving, a salmon salad is a nutritional powerhouse. Canned salmon brings restaurant-quality taste to your kitchen, without the fuss.

Whether you’re meal prepping or just need a quick snack, this salmon salad recipe is perfect. It’s gluten-free and packed with protein, meeting many dietary needs while tasting amazing.

Ready to change up your lunch routine? Let’s explore the world of delicious, nutritious salmon salad that’s easy and satisfying.

What Makes Canned Salmon a Great Choice?

Canned salmon is a nutritional powerhouse. It turns your healthy sandwiches into protein-packed ones with little effort. This ingredient is both convenient and nutritious, making your meals better instantly.

Nutritional Powerhouse

Salmon is an exceptional protein source with amazing health benefits. Each serving has 15 grams of protein, perfect for nutritious meals. Its nutritional profile is impressive:

  • Rich in omega-3 fatty acids
  • Excellent source of vitamin D
  • Contains essential minerals like selenium
  • Low in carbohydrates (just 1g per serving)

“Canned salmon provides a quick, nutritious protein boost without compromising on flavor or quality.” – Nutrition Expert

Convenience Factor

For those with busy lives, canned salmon is the ultimate quick meal solution. Brands like Wild Planet offer skinless, boneless options ready in minutes. You can make a delicious salmon salad in just 5 minutes!

Canned salmon is versatile, not just for sandwiches. It’s great in pasta dishes, breakfast scrambles, or classic salads. It lasts months in your pantry, offering consistent nutrition and taste.

Nutritional Highlights Per Serving
Calories 232
Protein 15g
Total Fat 16g

Looking for healthy sandwiches or new canned fish recipes? Salmon offers unbeatable taste, nutrition, and convenience.

Essential Ingredients for Your Salmon Salad

Making a tasty seafood sandwich begins with picking the right ingredients. Whether you’re on a budget or want to make your tuna sandwich better, knowing the key parts is key. This will make your salmon salad delicious.

Types of Canned Salmon to Consider

Not all canned salmon is the same. Choose high-quality brands for the best taste and nutrition. Here are some top picks:

  • Wild Planet: Known for sustainable sourcing
  • Safe Catch: Premium wild-caught salmon
  • Natural Sea: Organic and responsibly harvested options

Fresh Ingredients to Enhance Flavor

Boost your budget-friendly meals with these fresh ingredients. They pair well with canned salmon:

Ingredient Quantity Purpose
Mayonnaise ¼ cup Creamy base
Celery ¼ cup, diced Crunch and freshness
Red Onion 2 tablespoons, minced Sharp flavor
Fresh Dill 1 tablespoon, chopped Herbal notes
Lemon Juice 1 tablespoon Brightness and acidity

Pro tip: Always choose fresh ingredients to maximize the flavor of your salmon salad. The right mix can turn a simple tuna sandwich into a memorable seafood treat.

By picking the right canned salmon and fresh ingredients, you’ll make a tasty seafood sandwich. It’s healthy and won’t break the bank. The secret to a great salmon salad is mixing flavors and textures well.

Step-by-Step Guide to Making Canned Salmon Sandwiches

Making a tasty canned salmon sandwich is simple. It turns basic ingredients into a delicious meal. In just a few minutes, you’ll have a healthy sandwich that’s a hit with everyone.

Preparing the Salmon

Choose a top-notch canned salmon. Drain it well, removing bones and skin. Gently flake the salmon with a fork to get small, even pieces.

Mixing the Ingredients

To make the perfect filling, mix your ingredients carefully. Here’s how:

  • Use about 2½ ounces of salmon per sandwich
  • Add 2-3 tablespoons of mayonnaise for creaminess
  • Include finely chopped celery for crunch
  • Dice red onion for more flavor
  • Season with fresh dill, lemon juice, and black pepper

For a lower-calorie option, try Greek yogurt instead of mayonnaise. This swap cuts calories by about 50% but keeps the flavor great.

Serving Suggestions

Choose a sturdy bread like sourdough or whole grain for your sandwich. Each sandwich has about ½ cup of filling. Top it with sliced tomatoes or fresh arugula for extra nutrition.

Pro tip: Serve your canned salmon sandwich right away for the best taste and texture!

Flavor Variations for Your Salmon Salad

Turn your canned fish recipes into a gourmet seafood sandwich by trying new flavors. You don’t need to be a master chef to make your salmon salad special. Just a few ingredients can make a big difference.

Salmon Salad Flavor Variations

Adding Spices and Herbs to Enhance Your Seafood Sandwich

Spices and herbs can really change your healthy sandwich. Here are some great options:

  • Fresh herbs like dill, chives, or parsley
  • Dried seasonings such as:
    • Paprika
    • Garlic powder
    • Smoked sea salt
  • Zesty additions like capers or minced shallots

Experimenting with Different Dressings

Your salmon salad is a blank canvas for creativity. Different dressings can change the whole taste of your sandwich.

Dressing Type Flavor Profile Best Paired With
Dijon Mustard Vinaigrette Tangy, Sharp Whole wheat bread
Lemon-Olive Oil Dressing Light, Citrusy Sourdough
Herb Mayonnaise Creamy, Fresh Multigrain bread

Remember, fresh ingredients are essential for a great seafood sandwich. Don’t be shy to try new things and find your favorite mix!

Popular Sandwich Combinations with Salmon Salad

Turning your canned salmon sandwich into a culinary adventure opens up a world of delicious possibilities. These protein-packed sandwiches are both nutritious and exciting. They offer creative ways to enjoy seafood beyond the traditional tuna sandwich.

Your salmon salad can become a gourmet experience with strategic ingredient combinations. These combinations elevate its flavor profile. The key is exploring diverse textures and complementary ingredients that make each bite memorable.

Salmon Salad with Avocado

Creamy avocado transforms your protein-packed sandwich into a luxurious meal. Try these delightful combinations:

  • Toasted sourdough bread with mashed avocado
  • Lettuce wraps featuring chunky salmon salad
  • Cucumber rounds topped with salmon and avocado

“A perfect salmon salad sandwich combines rich flavor with nutritional balance” – Culinary Experts

Spicy Salmon Salad Options

For those craving excitement, spicy salmon sandwiches deliver intense flavor. Consider these zesty variations:

  • Sriracha-infused salmon salad
  • Jalapeño-studded canned salmon sandwich
  • Spicy pepper blend mixed into traditional recipe

Each serving provides approximately 16 grams of protein and contains just 224 calories. These sandwiches are both delicious and nutritionally sound. With preparation time under 5 minutes, you can quickly craft a satisfying meal that tantalizes your taste buds.

Serving Suggestions and Pairings

Making the perfect fish sandwich is more than just mixing salmon salad. You can turn a simple meal into a delightful experience. Try different serving techniques to make lunch more exciting.

Salmon Sandwich Serving Suggestions

Choosing the Perfect Bread

The key to a great fish sandwich is the bread. Here are some tasty options:

  • Toasted whole wheat buns (recommended for optimal nutrition)
  • Sourdough slices for a tangy flavor
  • Multigrain bread for added texture
  • Gluten-free alternatives for dietary restrictions

Complementary Side Dishes

Choose sides that make your meal better. Here are some great choices:

  1. Crisp arugula salad
  2. Kettle chips for crunch
  3. Roasted asparagus spears
  4. Light garden salad

When making your fish sandwich, aim for 1/2 cup of salmon salad per sandwich. This size is perfect for a balanced meal.

Pro tip: Try adding capers or sliced avocado for unique flavors!

By picking the right bread and sides, you can make a simple salmon salad into a gourmet meal. It’s both healthy and tasty.

Tips for Storing and Reusing Salmon Salad

Smart storage and creative reuse are key to making the most of your canned fish recipes. Your protein-packed sandwiches can stay fresh and tasty with the right techniques. This makes budget-friendly meals even more convenient.

Proper Storage Techniques

Keeping your salmon salad fresh and tasty starts with proper refrigeration. Follow these essential guidelines:

  • Store salmon salad in an airtight container
  • Refrigerate immediately after preparation
  • Maintain refrigerator temperature at 40°F or below
  • Use a clean utensil each time you serve to prevent contamination

Understanding Shelf Life

Canned salmon is great for making protein-packed sandwiches and other budget-friendly meals. Unopened canned salmon can last 2-5 years when stored in a cool, dry place.

Once prepared, your salmon salad can be safely stored in the fridge for up to 5 days. Remember these critical food safety tips:

  1. Refrigerate within 2 hours of preparation
  2. Discard if left at room temperature for more than 2 hours
  3. Check for any signs of spoilage before consuming

Repurposing leftover salmon salad can transform your meal prep. Try using it as a topping for salads, stuffing for vegetables, or as a protein boost in your favorite canned fish recipes.

Healthy Modifications for Your Salmon Sandwich

Making healthy sandwiches doesn’t mean losing flavor. You can turn protein-packed sandwiches into nutritious meals with a few tweaks. Your canned salmon sandwich is a great candidate for healthier changes that support your wellness.

Reducing Calories and Fat

Make your canned salmon sandwich healthier with simple swaps:

  • Replace mayonnaise with Greek yogurt for a protein-rich, lower-fat option
  • Use mashed avocado as a creamy spread for healthy fats
  • Add fresh herbs like dill or chives for flavor without calories

Gluten-Free Sandwich Solutions

Discover exciting gluten-free options for your sandwiches:

  • Use large lettuce leaves as a fresh, crisp wrap
  • Choose certified gluten-free bread alternatives
  • Try cucumber slices as a low-carb base
Modification Benefit Nutrition Impact
Greek Yogurt Replacement Lower Fat Increased Protein
Lettuce Wrap Gluten-Free Reduced Carbohydrates
Fresh Herb Addition Enhanced Flavor Zero Calorie Boost

With these healthy tweaks, you can enjoy a tasty canned salmon sandwich. It supports your nutritional goals and keeps your taste buds happy.

Hosting a Salmon Sandwich Bar

Turn your next party into a fun food adventure with a seafood sandwich bar. It lets everyone make their own perfect lunch with ease.

Setting up a salmon sandwich bar is easy and fun. Your guests will love making their own seafood sandwiches with tasty ingredients.

Creating Your Salad Station

Begin by setting up a station with all the parts you need. Make sure to have a variety that everyone can enjoy.

  • Choose 3-4 types of bread or wraps
  • Prepare canned salmon in different seasoning styles
  • Offer multiple fresh vegetable toppings
  • Include various spreads and condiments

Creative Toppings for Customization

Let guests get creative with exciting toppings. This turns a simple sandwich into a gourmet treat.

  • Fresh Vegetables: Sliced cucumber, tomatoes, red onions
  • Creamy Spreads: Cream cheese, avocado spread
  • Herbs and Seasonings: Dill, chives, capers
  • Unique Additions: Pickled vegetables, microgreens

Your salmon sandwich bar will be the star of any event. It offers a fun and interactive dining experience for all.

Frequently Asked Questions about Canned Salmon

Many home cooks wonder about canned salmon when making a sandwich or looking for affordable meals. Wild-caught Alaskan salmon is the top choice. It’s packed with nutrients and easy to use.

People often worry about safety. But canned salmon is made at the peak of freshness. It lasts 3-6 years if stored right. Plus, it has less mercury than other fish, making it safer to eat often.

Canned salmon is also very nutritious. It has high-quality protein for muscles and more calcium than fresh salmon. The omega-3s are good for your heart and brain. This makes your sandwich not only tasty but also healthy. It’s perfect for quick, budget-friendly meals.

When picking canned salmon, choose wild-caught and check the sodium. Lower sodium is better for health. A 6-ounce can is the usual serving size. It’s a convenient and affordable protein for your cooking.

FAQ

Is canned salmon as nutritious as fresh salmon?

Yes, canned salmon is as nutritious as fresh salmon. It keeps most of its omega-3 fatty acids, protein, and vitamins. Canned salmon even has edible bones for extra calcium. The canning process keeps many nutrients, making it a great protein choice.

How long can I store prepared salmon salad in the refrigerator?

You can store salmon salad in the fridge for 3-5 days in an airtight container. Keep it at 40°F or below. For the best taste, eat it within 2-3 days.

Can I make a salmon salad if I’m gluten-free?

Absolutely! Canned salmon is gluten-free. Use gluten-free bread or lettuce wraps for a gluten-free salmon sandwich. Always check the ingredients to ensure they’re gluten-free.

What’s the difference between wild-caught and farm-raised canned salmon?

Wild-caught salmon tastes richer and has more omega-3s. Farm-raised salmon is cheaper. Wild Alaskan salmon is top quality, with less mercury and better fishing practices. Choose based on taste and budget.

How can I make my salmon salad more interesting?

Add diced red onion, capers, fresh dill, or chopped celery. Try Greek yogurt instead of mayonnaise. Add herbs like chives or parsley. Spices like smoked paprika can also enhance the flavor.

Is canned salmon safe to eat directly from the can?

Yes, canned salmon is safe to eat straight from the can. It’s fully cooked. But, most people prefer to mix it with other ingredients for flavor. Always check the can for damage before opening.

How can I reduce calories in my salmon sandwich?

Use Greek yogurt instead of mayonnaise. Choose whole grain or thin bread. Add lots of fresh veggies. Try lettuce wraps or a mixed green salad for a low-carb option.

What’s the best way to drain canned salmon?

Open the can and press down on the salmon with the lid. Tilt the can to drain excess liquid. You can remove the skin and small bones for extra nutrition. Flake the salmon with a fork and remove any large bones if needed.

Can I freeze salmon salad?

Freezing salmon salad with mayonnaise or yogurt isn’t recommended. These ingredients separate and lose texture when thawed. Keep the salmon and mix-ins separate and mix just before serving for the best taste.

How can I make my salmon sandwich more protein-packed?

Add hard-boiled eggs, cottage cheese, or thick Greek yogurt. Use high-protein bread or add toppings like sliced almonds or hemp seeds. This increases the protein content.

By:

March 7, 2025

salmon sandwiches recipe

Lunchtime can be a time to explore new flavors. Imagine a quick and tasty salmon sandwiches recipe that makes your lunch healthy and full of protein. This easy recipe is about to change how you eat at lunch.

Looking for a healthy sandwich? This salmon salad sandwich is your answer. It’s ready in 10 minutes and has 15 grams of protein and 232 calories. It’s a nutritional winner that tastes great.

Busy people and those who care about their health will love this recipe. It’s easy to make, perfect for meal prep or a quick lunch. You can serve it on toasted sourdough or crisp lettuce wraps. It’s a meal that fits your lifestyle.

Ready to make your lunchtime better? Try a salmon salad sandwich that’s both delicious and healthy. Your taste buds and body will be grateful for this amazing find.

Introduction to Salmon Salad Sandwiches

Salmon salad sandwiches are a hit for those who want a healthy and tasty meal. They mix great flavor with good nutrition. This makes them a top pick for quick, fulfilling lunches.

What is a Salmon Salad Sandwich?

A salmon salad sandwich is a tasty mix of salmon, creamy ingredients, and fresh veggies on bread. It usually has:

  • Canned or fresh salmon
  • Creamy base (like Greek yogurt)
  • Chopped vegetables
  • Seasonings
  • Bread of choice

Benefits of Eating Salmon

Salmon is full of nutrients that are good for your health. Here are some key benefits:

  • Omega-3 Fatty Acids: Good for your brain and thinking
  • High-quality protein (about 35 grams per 6-ounce serving)
  • Rich in essential vitamins and minerals
  • Helps reduce inflammation
  • Promotes heart health

Choosing salmon salad sandwiches means you’re getting a tasty meal and boosting your health. These recipes are a smart way to add heart-healthy nutrients to your diet.

Pro tip: Opt for whole grain bread to add extra fiber and nutritional value to your seafood sandwiches!

Ingredients Needed for Salmon Salad

Making tasty salmon recipes begins with picking the right ingredients. Knowing your salmon choices and key ingredients can turn a simple lunch into a special meal.

Fresh vs. Canned Salmon: Making the Right Choice

When making salmon salad, you can choose between fresh or canned salmon. Canned salmon has many benefits:

  • Long shelf life (3-5 years when stored properly)
  • Affordable pricing
  • Comparable nutritional value to fresh salmon
  • Convenient preparation

Essential Ingredients for Your Salmon Salad

To make the perfect salmon salad, you need a mix of ingredients. Here’s a list of must-haves:

Ingredient Quantity Purpose
Canned Salmon 7.5 ounces Primary protein source
Mayonnaise 1/4 cup Creamy binding agent
Dijon Mustard 2 teaspoons Adds tangy flavor
Black Pepper 1/4 teaspoon Enhances seasoning

Healthy Add-ins for Extra Flavor

Make your salmon salad better with healthy and tasty extras:

  1. Capers (1 tablespoon) for briny complexity
  2. Scallions (1/4 cup, green part) for freshness
  3. Optional hot pepper sauce for heat
  4. Chopped celery for crunch

Pro tip: For a lighter version, consider using vegan mayo, which can reduce calorie content by up to 50%!

The secret to great smoked salmon sandwiches is in the quality of your ingredients and how you prepare them. Try different add-ins to find your favorite salmon recipe mix.

Step-by-Step Guide to Making Salmon Salad

Making the perfect salmon sandwiches recipe is all about paying attention to detail. These easy lunch recipes are designed to make your meal prep fun and simple.

To start a delicious salmon salad, pick high-quality ingredients and follow a simple process. We’ll guide you through each step to make a tasty sandwich.

Preparing the Salmon

Begin with a 10-ounce salmon filet. You have two main ways to prepare your salmon:

  • Bake the salmon at 400°F for 8-12 minutes
  • Cook until the internal temperature reaches 145°F
  • Let the salmon cool completely before flaking

Mixing Your Ingredients

In a large mixing bowl, mix your flaked salmon with these important ingredients:

  1. Finely chopped red onion
  2. Diced celery
  3. Fresh dill
  4. Mayonnaise
  5. Lemon juice

“The secret to a great salmon salad is balancing flavors and textures.” – Culinary Expert

Tips for Perfecting the Consistency

Getting the right consistency is key for your salmon sandwiches recipe. Gently fold ingredients to keep the salmon flaky. Taste and adjust seasonings as needed. A pinch of salt and pepper can make a big difference.

Pro tip: Refrigerate your salmon salad for 30 minutes before serving. This lets the flavors mix, making your sandwich even better.

Choosing the Right Bread for Your Sandwich

Creating the perfect salmon salad sandwich begins with the right bread. The bread you choose can turn a simple sandwich into a gourmet delight. With creative sandwich recipes on the rise, knowing your bread options is key for healthy meals.

When picking bread, think about texture, taste, and health benefits. A surprising 60% of sandwich lovers say the bread’s type greatly affects the flavor.

Popular Bread Choices

Your choice of bread can make your salmon salad sandwich stand out. Here are some top picks:

  • Whole grain bread (a favorite among 70% of health-conscious eaters)
  • Sourdough for a tangy twist
  • Rye bread for a bold taste
  • Multigrain for extra nutrition

Gluten-Free Options

For those with gluten allergies, great gluten-free choices include:

  • Gluten-free rice bread
  • Almond flour bread
  • Coconut flour bread
  • Cauliflower-based bread

How to Toast Your Bread

Toasting your bread can make a big difference. An impressive 65% of people say toasted bread makes their sandwiches better.

Toasting Method Recommended Time Bread Type Compatibility
Toaster 1-2 minutes Most bread types
Oven broiler 2-3 minutes Thick-cut breads
Skillet 1-2 minutes per side Artisan breads

Pro tip: Use a serrated knife for clean cuts and prevent bread from tearing when preparing your salmon salad sandwich.

Assembly of the Salmon Salad Sandwich

Making the perfect salmon salad sandwich needs focus and a few tricks. Whether you’re making traditional or open-faced salmon sandwiches, how you put them together makes all the difference. It can turn your sandwich from good to great.

Layering Techniques for a Perfect Sandwich

Learning to layer your sandwich is key to a tasty meal. Start with a good base of bread. You can pick from ciabatta, whole wheat, or sourdough. For open-faced sandwiches, use just one slice of toasted bread.

  • Begin with a thin layer of spread (mayo or cream cheese)
  • Add a generous scoop of prepared salmon salad
  • Create height and texture with strategic layering

Adding Crunch with Vegetables

Vegetables make your salmon salad sandwich amazing. Fresh, crisp ingredients add texture and nutrients. Here are some crunchy options:

  • Thinly sliced cucumber
  • Crisp lettuce leaves
  • Sliced red onions
  • Pickled radishes

Spreading Condiments Evenly

The secret to a great sandwich is spreading condiments evenly. Use the back of a spoon to spread your sauce all over. This way, every bite is full of flavor.

You can serve your salmon salad sandwich in different ways. Try it as a traditional sandwich, open-faced, or even in a lettuce wrap. Experiment to find your favorite way to enjoy it!

Serving Suggestions for Salmon Salad Sandwich

Make your seafood sandwiches special with creative serving ideas. Salmon salad sandwiches are both tasty and healthy. They’re perfect for a nutritious lunch.

Perfect Pairings for Your Salmon Salad

Pair your salmon salad sandwich with sides that boost flavor and health. Here are some great choices:

  • Crisp vegetable sticks
  • Light garden salad
  • Chilled cucumber soup
  • Quinoa side dish

Salmon Salad Sandwich Serving Suggestions

Presentation Tips for an Impressive Lunch

Make your seafood sandwich look amazing with these tips:

  1. Serve on a bed of crispy romaine lettuce
  2. Garnish with colorful chopped vegetables
  3. Drizzle with light vinaigrette
  4. Add a sprinkle of fresh herbs
Serving Option Nutritional Benefit
Salad Base Adds fiber and nutrients
Vegetable Garnish Increases vitamin intake
Light Dressing Enhances flavor without excess calories

“A beautifully presented meal is a feast for both the eyes and the palate.”

Try these serving suggestions to make a lunch that’s both healthy and beautiful. Your salmon salad sandwich will be the star of your meal.

Variations of the Salmon Salad Recipe

Spice up your salmon recipes with exciting twists. These changes turn traditional salmon patty sandwiches into culinary adventures. Exploring different flavors makes your lunch both delicious and exciting.

Salmon salad is incredibly versatile. You can customize your sandwich with unique ingredients and flavors. Let’s explore three tasty variations that will make your lunch unforgettable.

Mediterranean Twist

Create a Mediterranean-inspired salmon salad with these vibrant ingredients:

  • Crumbled feta cheese
  • Sliced kalamata olives
  • Diced cucumber
  • Fresh chopped parsley
  • Capers for extra tang

Spicy Avocado Variation

For those who love a kick, try this zesty salmon patty sandwich variation:

  • Ripe avocado, mashed
  • Diced jalapeños
  • Sriracha sauce
  • Chopped cilantro
  • Lime juice

Classic Dill and Lemon Recipe

Embrace the timeless combination of dill and lemon in your salmon recipes:

  • Fresh dill, finely chopped
  • Dijon mustard
  • Lemon zest
  • Freshly squeezed lemon juice
  • Chopped chives

Each variation brings a unique flavor to your salmon salad. This ensures your sandwiches never get boring. Experiment with these ideas or create your own signature blend!

Storing Leftovers Safely

When you make your tasty salmon sandwiches, it’s important to know how to store leftovers. This keeps your food safe and fresh. Salmon salad, in particular, needs careful handling to stay enjoyable.

Storing your salmon salad right can make it last longer and taste better. It’s all about the right fridge and reheating methods.

Best Practices for Refrigeration

Here are the top tips for keeping your salmon salad fresh:

  • Use an airtight container to prevent moisture and odor absorption
  • Store in the refrigerator at 40°F (4°C) or below
  • Consume within 3-4 days for optimal freshness

Ways to Repurpose Leftovers

Turn your leftover salmon salad into new, exciting dishes with these ideas:

  1. Top a fresh green salad for a protein-rich lunch
  2. Use as a spread on crackers for a quick snack
  3. Create a salmon salad stuffed avocado
Storage Method Duration Best Practices
Refrigerator 3-4 days Airtight container, below 40°F
Freezer Up to 6 months Use freezer-safe container

Pro tip: Always check for signs of spoilage before consuming leftover salmon salad. Discard if you notice any unusual odors, discoloration, or slimy texture.

Nutritional Information

Making healthy sandwiches means knowing the nutritional value of a salmon salad sandwich. This meal is full of important nutrients that help your health.

Salmon Salad Sandwich Nutrition

Looking into salmon recipes, we see how important nutrition is. A single serving of this sandwich offers great health benefits thanks to its ingredients.

Calorie and Macronutrient Breakdown

Your salmon salad sandwich has a balanced mix of nutrients:

  • Total Calories: 537 per sandwich
  • Protein: 14g (supports muscle health)
  • Fat: 8g (includes heart-healthy omega-3s)
  • Carbohydrates: 5g (low-carb friendly)

Detailed Nutritional Profile

Nutrient Amount Key Benefit
Omega-3 Fatty Acids 1,500-2,000 mg Brain health support
Protein 14g Muscle maintenance
Fiber 3-4g Digestive health

Health Benefits of Key Ingredients

Your salmon salad sandwich has ingredients that boost its nutritional value:

  1. Salmon: Rich in omega-3s for cognitive function
  2. Whole grain bread: Provides complex carbohydrates
  3. Fresh vegetables: Adds essential vitamins and minerals
  4. Greek yogurt: Contributes protein and probiotics

Choosing this salmon recipe means you’re not just eating well. You’re also taking care of your nutritional health.

Meal Prep with Salmon Salad Sandwiches

Turning your easy lunch recipes into a meal prep plan can save time and reduce stress. Salmon sandwich fans will love these tips for making tasty, healthy meals ahead of time.

Good meal prep starts with planning and picking the right ingredients. Canned salmon is a great choice. It lasts long and is as nutritious as fresh salmon.

Creating a Weekly Meal Plan

Having a meal plan can change your lunch game. Here are some tips:

  • Make salmon salad in bulk on weekends
  • Use meal prep containers with separate sections
  • Try different sandwich styles to keep things interesting
  • Keep ingredients separate to keep them fresh

Time-Saving Preparation Tips

Make your salmon sandwich prep faster with these tips:

  1. Pre-chop veggies like celery and onions
  2. Store salmon salad in airtight containers
  3. Assemble sandwiches just before eating
  4. Follow storage guidelines (3-4 days in the fridge)

Pro tip: Don’t make complete sandwiches ahead of time to avoid soggy bread!

Choose top-notch canned salmon brands like Wild Planet or Safe Catch. They are wild-caught and mercury-tested, making them safe and healthy.

With some planning, your salmon salad sandwiches can be a quick, healthy, and enjoyable lunch. It will also save you time in the morning.

Pairing Beverages with Salmon Salad Sandwiches

Finding the perfect drink for your seafood sandwiches can make your meal better. The right drink brings out the flavors of salmon salad and adds refreshment and nutrition.

When you’re looking for healthy sandwich ideas, picking the right drink is key. It can make your meal more enjoyable and add to your nutrition.

Suggested Drinks for a Light Lunch

  • Sparkling Water with Citrus: A zesty, calorie-free option that cleanses the palate
  • Unsweetened Iced Green Tea: Provides antioxidants and subtle refreshment
  • Cucumber-Infused Water: Hydrating and light, complementing seafood sandwiches
  • White Wine Spritzer: A low-alcohol option for leisurely lunches

Health-conscious Beverage Options

For those focusing on nutrition, here are some mindful drink choices:

  1. Herbal Infusions: Zero-calorie, nutrient-rich alternatives
  2. Kombucha: Probiotic-rich drink supporting digestive health
  3. Low-sodium Vegetable Juice: Adds extra nutrients to your meal
  4. Coconut Water: Natural electrolyte replenishment

Your drink can turn a simple salmon salad sandwich into a balanced, enjoyable lunch. Pick drinks that taste good and support your health goals.

Conclusion: Enjoy Your Salmon Salad Sandwich!

Your journey to making the perfect salmon sandwiches recipe is over. But, your culinary adventure is just starting. Salmon burgers and salad sandwiches let you try many flavors while staying healthy.

Making your own salmon salad sandwich is more than cooking. It’s about showing your creativity in the kitchen. With prep time under 10 minutes and 2½ ounces of salmon, you can make a simple lunch into a fancy meal. Use dense breads like sourdough or whole grain for a great base.

Every salmon sandwich has its own story. Whether you use Sockeye salmon from Bristol Bay or try new seasonings, each bite is a part of your personal style. Store leftovers in the fridge for 3-4 days. Feel free to change the recipe to fit your taste.

Explore the wonderful world of salmon sandwiches. Your taste buds will love the exciting, healthy, and tasty journey ahead!

FAQ

How long can I store salmon salad in the refrigerator?

You can keep salmon salad in the fridge for 3-4 days. Make sure it’s in an airtight container. Always check for spoilage before eating and keep it cool.

Can I use fresh salmon instead of canned salmon?

Yes, you can! Fresh salmon is great for salads. Cook it, cool it, and flake it into your mix. It tastes richer than canned salmon.

Are salmon salad sandwiches good for weight loss?

Salmon salad sandwiches are good for losing weight. They’re full of protein and omega-3s. Choose whole grain bread and Greek yogurt for a healthier version.

What are some gluten-free bread alternatives for my salmon salad sandwich?

Try lettuce wraps, almond or coconut flour bread, or rice cakes. You can also use cucumber slices. Each option adds a unique twist to your sandwich.

How can I add more flavor to my salmon salad?

Add herbs like dill and chives, or spices like capers and lemon zest. Crunchy elements like celery and nuts also add flavor and texture.

Is canned salmon nutritionally comparable to fresh salmon?

Yes, canned salmon is very similar to fresh. It’s packed with skin and bones, adding calcium. It’s a convenient, affordable choice with most of fresh salmon’s nutrients.

Can I freeze salmon salad for later use?

Freezing salmon salad isn’t recommended. Mayonnaise and Greek yogurt separate and lose texture when thawed. For best taste, make it fresh and eat within 3-4 days.

What are some quick protein additions to my salmon salad?

Add hard-boiled eggs, cottage cheese, or chia seeds for more protein. These boost the salad’s nutrition without changing its taste.

Are salmon salad sandwiches kid-friendly?

Many kids like salmon salad sandwiches, especially with mild flavors. Make them fun by cutting into shapes or letting kids help make them.

What makes salmon such a healthy protein choice?

Salmon is full of protein, omega-3s, vitamin D, and B vitamins. These nutrients are good for the heart, brain, and reduce inflammation.

By:

March 7, 2025

smoked salmon sandwich recipe

Imagine a lazy summer afternoon with sunlight in the kitchen. A gourmet smoked salmon sandwich is waiting to be made. This recipe is more than food—it’s a celebration of fresh ingredients and simple art.

Your taste buds are in for a treat with this smoked salmon sandwich. It has 537 calories of pure deliciousness. In just 20 minutes, you’ll make a masterpiece with smoky salmon and crisp veggies.

Picture biting into a sandwich with Norwegian cold-smoked salmon and creamy herbed cheese. It’s all on a crusty demi-baguette. Each bite is a symphony of flavors that makes the sandwich special.

These smoked salmon sandwiches are perfect for a quick lunch or a picnic. They offer a mix of nutrition and indulgence. Get ready to make a recipe that’s both versatile and delicious.

Introduction to Smoked Salmon Sandwiches

Explore the world of smoked salmon sandwiches. They are both nutritious and full of flavor. These sandwiches turn simple ingredients into amazing meals that please your taste and are good for you.

Benefits of Smoked Salmon

Smoked salmon is not just tasty—it’s also very healthy. It offers many health benefits:

  • It’s full of high-quality protein for muscle health
  • It has omega-3 fatty acids that are good for your heart and brain
  • It’s low in calories but high in protein, about 16g per serving
  • It also has important minerals like selenium and vitamin D

Versatility of Sandwiches

Your smoked salmon sandwich can change with your mood and needs. It can be a quick lunch, a fancy tea sandwich, or a big dinner. These recipes let you try new things every time.

“A great sandwich is an art form that combines flavor, nutrition, and creativity.” – Culinary Expert

Salmon sandwiches come in many styles, from classic to new. You can make them hot or cold, toasted or fresh. This way, you can always find a salmon sandwich that fits your taste and health goals.

Key Ingredients for a Perfect Sandwich

Making a great salmon and cream cheese sandwich needs the right ingredients. The success of your sandwich comes from picking the best parts. These parts should work well together for a tasty experience.

Fresh Smoked Salmon: The Star Ingredient

The main part of a bagel with smoked salmon is the fish. Look for high-quality cold-smoked salmon. It should have a soft texture and a deep flavor.

When picking salmon, remember these points:

  • Wild-caught salmon tastes better
  • Choose salmon with a bright pink-orange color
  • Go for salmon with little processing
  • Choose options that are good for the planet

Creamy Dressings: Elevating Your Sandwich

The creamy base you choose can make a big difference. Both mayonnaise and yogurt have their own special qualities:

Mayonnaise Yogurt
Rich, indulgent texture Lighter, tangier profile
Higher fat content Lower calorie option
Classic sandwich spread Healthier alternative

Fresh Herbs: The Flavor Enhancers

Fresh herbs can make your salmon and cream cheese sandwich even better. Dill is a classic choice for smoked salmon. It adds a bright, fresh taste.

  • Chop herbs finely for even distribution
  • Use fresh herbs for maximum flavor
  • Try mixing dill with chives for a unique taste

Preparing the Core Components

Making a tasty salmon lox sandwich begins with preparing essential ingredients. These ingredients can turn a simple sandwich into a gourmet treat. It’s a dish that will wow even the pickiest eaters.

Crafting the Perfect Lemon Dill Sauce

Your smoked salmon appetizers need a sauce that matches their rich taste. Here’s a simple recipe for a creamy lemon dill sauce:

  • 1/4 cup mayonnaise
  • 2 tablespoons sour cream
  • 1 teaspoon white wine vinegar
  • 2 tablespoons fresh chopped dill
  • Pinch of salt
  • Optional: Capers for extra zest

Mix all ingredients until smooth. This sauce adds a tangy, herbaceous flavor that boosts the smoked salmon’s taste.

Selecting Fresh Vegetables for Your Sandwich

The right veggies can add crunch and freshness to your salmon lox sandwich. Here are some great choices:

  • Arugula: Provides a peppery bite
  • Cucumber: Adds crisp texture
  • Thinly sliced red onions
  • Fresh tomato slices

Choose crisp, fresh veggies that match the smoky salmon’s flavor. These additions make your sandwich look and taste amazing, turning it into a feast for the eyes and taste buds.

Pro tip: Slice veggies thinly to ensure even distribution and optimal texture in every bite.

Choosing the Right Bread

Creating the perfect smoked salmon sandwich starts with the right bread. The right bread can make your sandwich go from good to great. It turns a simple meal into a gourmet delight.

Bread Varieties That Complement Smoked Salmon

When making smoked salmon canapés or sandwiches, your bread choice is key. Here are some top picks:

  • Sourdough: Offers a tangy flavor that pairs wonderfully with smoked salmon
  • Pumpernickel: Provides a rich, dense texture that stands up to creamy salmon
  • Whole grain: Adds nutritional value and a nutty undertone
  • Ciabatta: Creates a rustic, artisanal feel to your sandwich

Gluten-Free Bread Options

Don’t let dietary restrictions stop you from cooking. Gluten-free bread is a great choice for those with sensitivities.

Bread Type Texture Flavor Compatibility
Gluten-Free Sourdough Soft with slight chew Excellent with smoked salmon
Almond Flour Bread Dense and nutty Complements salmon’s richness
Quinoa Bread Light and airy Neutral background for salmon

Pro tip: Always toast your bread lightly to create a moisture barrier that prevents sogginess in your smoked salmon sandwich recipe.

Remember, the bread is more than just a vessel for your smoked salmon canapés—it’s an integral part of the overall flavor profile. Choose wisely, and your sandwich will thank you!

Assembling Your Sandwich

Making the perfect smoked salmon sandwiches is more than just mixing ingredients. It’s about layering and presentation to make your meal special.

Assembling a tasty smoked salmon sandwich is an art. It’s about layering to get the best flavors and textures. Here’s how to make an amazing sandwich:

  1. Start with 8 slices of rye bread, carefully trimmed
  2. Spread a thin layer of crème fraîche on each bread slice
  3. Layer fresh arugula as your first green foundation
  4. Delicately place 1 oz of smoked salmon on top of the arugula
  5. Sprinkle a dash of fresh dill for enhanced flavor

Layering Techniques for Best Flavor

Your salmon sandwich will be a hit with the right layering. It’s all about balance. You want each ingredient to work well together without overpowering the salmon.

  • Use cream cheese sparingly to bind ingredients
  • Add capers for a tangy burst of flavor
  • Include thin tomato slices for moisture

Presentation Tips for a Gorgeous Sandwich

How your sandwich looks is just as important as how it tastes. Cut your sandwiches into elegant triangles or finger sandwiches. For special events like Easter or Mother’s Day, arrange them on a beautiful platter to wow your guests.

Pro tip: Lightly toast your bread for added crunch and visual texture!

With these tips, you’ll turn simple ingredients into a stunning smoked salmon sandwich. It will look as good as it tastes.

Storage and Meal Prep Tips

Making a tasty smoked fish sandwich needs smart storage and prep. Knowing how to keep your ingredients and sandwich fresh helps you enjoy great meals all week.

Smoked Salmon Sandwich Storage Tips

Sandwich Storage Guidelines

Here are key tips for storing your salmon and cream cheese sandwich:

  • Refrigerate right after you make it
  • Use airtight containers to keep it fresh
  • Eat it within 24 hours for the best taste
  • Keep it cold with an ice pack when you move it

Meal Prep Best Practices

Here are ways to make your smoked fish sandwich prep easier:

  1. Get your ingredients ready ahead of time
  2. Store the cream cheese mix separately
  3. Keep the smoked salmon cold
  4. Put your sandwich together just before eating

The creamy dill sauce can be made up to 5 days in advance if you store it in an airtight container in the fridge. This makes lunch prep on weekdays much easier.

Pro tip: Always check the freshness of your smoked salmon before making your sandwich. This ensures the best quality and taste.

By following these storage and prep tips, your smoked salmon sandwich will stay delicious and safe to eat. Proper prep and storage are crucial for a perfect sandwich every time.

Creative Variations to Try

Make your salmon lox sandwich more exciting with new flavors. Try different ingredients to turn a simple bagel into a gourmet treat. It’s a fun way to explore new tastes.

Creamy Avocado Enhancement

Adding avocado makes your sandwich creamy and rich. It pairs well with the smoky salmon. The avocado’s buttery texture is a perfect match.

  • Slice fresh avocado thin for even distribution
  • Mash avocado into a spread for extra creaminess
  • Sprinkle with sea salt and cracked black pepper

Tangy Flavor Boosters

Capers and pickles add a tangy kick to your sandwich. They bring a burst of flavor that balances the salmon’s richness.

Ingredient Flavor Profile Best Pairing
Capers Briny, Sharp Cold-smoked salmon
Pickles Tangy, Crisp Hot-smoked salmon
Red Onions Sharp, Pungent Both salmon types

Try these ingredients to make your bagel with smoked salmon unique. Feel free to mix and match to find your favorite!

Perfect Pairings: Side Dishes

Adding the right side dishes and drinks can make your smoked salmon sandwich better. Whether it’s appetizers or a full sandwich, picking the right sides is crucial. It turns a simple meal into a special one.

Smoked Salmon Sandwich Side Dishes

Think about sides that bring out the best in smoked salmon without taking over. Salads are great for quick, easy options.

Salad Companions for Smoked Salmon

  • Arugula salad with zesty lemon vinaigrette
  • Classic Caesar salad with light dressing
  • Cucumber salad with fresh herbs
  • Mixed green salad with roasted vegetables

Crispy Side Options

If you want something crunchy with your smoked salmon, try these:

  1. Kettle-cooked potato chips
  2. Herb-seasoned crisp crackers
  3. Sweet potato chips
  4. Homemade vegetable crisps

Beverage Pairings

The perfect drink can take your smoked salmon sandwich to the next level. Here are some good choices:

  • Crisp white wines like Sauvignon Blanc
  • Sparkling water with lemon
  • Light craft beer
  • Iced green tea

Choosing the right sides and drinks makes your meal complete. It highlights the rich, delicate taste of smoked salmon.

Conclusion: Enjoying Your Smoked Salmon Sandwich

Your journey with smoked salmon sandwiches is just starting. Every time you make one, you can try new flavors and methods. Whether you like Nova lox or Scottish smoked salmon, the goal is to find the perfect mix.

Smoked salmon sandwiches are great for any time. They’re perfect for quick lunches or fancy brunches. Brands like Acme Smoked Fish and SeaBear Smokehouse provide top-notch salmon to make your dish even better.

Experiment with Flavor Profiles

Feel free to be creative with your smoked salmon sandwiches. Try using herbed cream cheese or Greek yogurt as spreads. Add unique toppings like microgreens, capers, or everything bagel seasoning. Your special touch might just become a family favorite.

Share Your Culinary Adventures

We encourage you to share your smoked salmon sandwich creations. Each recipe has its own story. Your unique take could inspire others to try new things. Remember, cooking is about exploring, enjoying, and making tasty memories.

FAQ

What type of smoked salmon is best for sandwiches?

Choose high-quality wild-caught salmon. It should be thinly sliced and have a rich, smooth texture. Wild Alaskan or Norwegian smoked salmon is great. Cold-smoked salmon is best for sandwiches, offering a delicate flavor and tender consistency.

How long can I store a prepared smoked salmon sandwich?

Assembled sandwiches should be eaten within 4-6 hours if refrigerated. Prepare sandwich parts separately and assemble just before eating. If preparing in advance, keep wet ingredients separate and add just before serving to prevent bread from becoming soggy.

Are smoked salmon sandwiches healthy?

Yes, smoked salmon sandwiches are very nutritious. They’re rich in omega-3 fatty acids, high-quality protein, and essential vitamins. A typical sandwich provides excellent nutrients that support heart health, brain function, and provide sustained energy. Choose whole grain bread and fresh vegetables to enhance nutritional value.

Can I make a gluten-free smoked salmon sandwich?

Absolutely! Use gluten-free bread options like almond flour bread, rice cakes, or gluten-free bagels. Ensure your smoked salmon and additional ingredients are certified gluten-free. Many brands now offer delicious gluten-free alternatives that maintain great taste and texture.

What are some alternative spreads for smoked salmon sandwiches?

Try alternatives like herbed goat cheese, Greek yogurt with dill, avocado spread, hummus, or light mayonnaise mixed with fresh herbs. Each spread offers a unique flavor profile that complements the rich smoked salmon.

How can I make my smoked salmon sandwich more gourmet?

Use artisan bread, add capers, thinly sliced red onions, fresh dill, or a squeeze of lemon. Consider toasting the bread, using high-quality smoked salmon, and creating a homemade herb-infused spread. This will transform a simple sandwich into a culinary experience.

What wine pairs well with a smoked salmon sandwich?

Choose light, crisp white wines that complement the delicate salmon flavor. Sauvignon Blanc, Pinot Grigio, or a dry Riesling work excellently. These wines provide a refreshing contrast to the rich, smoky salmon without overpowering its subtle taste.

Can I prepare smoked salmon sandwiches for a large group?

Yes! Consider making mini sandwiches or canapés for easier serving. Prepare components in advance, use cocktail bread or small rolls, and assemble just before serving. This approach works great for brunches, parties, or buffet-style events.

How do I prevent my sandwich from becoming soggy?

Keep wet ingredients separate until serving. Use a light spread of butter or cream cheese on bread as a moisture barrier. Pat vegetables dry, and add crisp ingredients like cucumber or lettuce just before eating. If preparing in advance, pack components separately and assemble on-site.

Are there vegetarian alternatives to smoked salmon sandwiches?

Yes! Try using smoked carrot “lox”, marinated tofu, or roasted red pepper strips as plant-based alternatives. These options can mimic the texture and flavor profile of smoked salmon while providing a vegetarian-friendly option that’s equally delicious.

By:

March 5, 2025

salmon salad sandwich

Life can get busy, making it hard to find a quick, healthy meal. I’ve been there, feeling hungry and needing something fast and nutritious. That’s when salmon salad sandwich ideas save the day!

Salmon salad sandwiches are perfect for a quick, fulfilling meal. In just 5 minutes, you can make a protein-packed lunch. They’re great for anyone who’s always on the move, like busy professionals, students, or parents.

These sandwiches offer 41 grams of protein and a mix of tasty flavors. They’re not just fast; they’re also a nutritional boost. You can easily adjust them to fit your taste and dietary needs.

Prepare to discover a variety of easy salmon sandwich recipes. They’ll make your mealtime enjoyable and stress-free!


What Makes a Great Salmon Sandwich?

Making a perfect salmon sandwich needs focus and the right ingredients. Your ideas can go from simple to amazing with the right mix of fresh parts and creative methods.


The Importance of Fresh Ingredients

Fresh ingredients are key to a top-notch smoked salmon sandwich. When picking salmon, remember these points:

  • Wild-caught salmon tastes better
  • Choose fish that’s bright and firm, with no discoloration
  • Get salmon from trusted seafood places
  • Try both fresh and smoked salmon

Choosing the Right Bread

The bread you pick is vital for your salmon sandwich. Texture and flavor must match the salmon well.

  • Sourdough: Its tangy taste goes well with salmon
  • Whole wheat: It’s good for you
  • Rye bread: Offers a strong flavor
  • Ciabatta: It has a nice texture

Flavor Combinations to Consider

Make your salmon sandwich stand out with new flavors. Smoked salmon sandwiches are a canvas for creativity.

  • Cream cheese with dill
  • Capers and red onion
  • Avocado and lemon zest
  • Cucumber and fresh herbs

Pro tip: Balance your ingredients to enhance the salmon’s natural richness!

Classic Salmon Salad Sandwich Recipe

Looking for a quick and healthy meal? Salmon salad sandwiches are perfect for busy people. They are tasty, packed with protein, and easy to make in minutes.

Start your journey with salmon salad sandwiches. This easy recipe combines fresh ingredients and great taste. It works for salmon bagel sandwiches or traditional ones.

Ingredients You’ll Need

  • 2 (5-6 oz) cans of wild-caught salmon
  • ⅓ cup mayonnaise (or vegan mayo for a lighter option)
  • 1 medium stalk celery, finely chopped
  • 3 tablespoons finely chopped red onion
  • 1 tablespoon fresh dill (or 1 teaspoon dried dill)
  • Salt and pepper to taste
  • Bread or bagel for serving

Step-by-Step Preparation

  1. Drain the canned salmon thoroughly
  2. Flake the salmon in a medium mixing bowl
  3. Add mayonnaise, chopped celery, and red onion
  4. Sprinkle fresh or dried dill
  5. Mix ingredients until well combined
  6. Season with salt and pepper

Serving Suggestions

Your salmon salad is super versatile! You can put it on whole wheat bread, make a salmon bagel sandwich, or use it as a dip. Pro tip: Add some arugula or cucumber slices for extra nutrition.

“A quick, protein-rich meal that never disappoints!” – Home Cooking Enthusiast

This salmon salad is packed with 15 grams of protein, just 232 calories, and can be tailored to your liking. Store it in an airtight container for up to 5 days for easy meal prep.

Creative Variations on Salmon Salad

Make your salmon sandwiches more exciting with new flavors. These ideas will help you try out different tastes in your salmon wraps and sandwiches.

Avocado and Salmon Sandwich

Adding creamy avocado to your salmon sandwich is a game-changer. Just 1 medium chopped avocado makes the salad creamy and full of healthy fats. It adds a smooth texture and more nutrients to your meal.

  • Use fresh, ripe avocado for maximum creaminess
  • Slice extra avocado for added texture
  • Recommended serving: 8 oz. cooked and flaked salmon

Mediterranean-Inspired Salmon Delight

Give your salmon sandwich a Mediterranean twist. Add chopped cucumber, red bell peppers, and red onions for a colorful and fresh salmon wrap. These veggies add crunch and make your sandwich healthier.

  • Total vegetable volume: 10.75 cups
  • Add capers for an authentic Mediterranean touch
  • Use whole wheat buns for added nutrition

Spicy Sriracha Salmon Spread

For a spicy kick, try a salmon salad with Sriracha sauce. This adds a bold flavor to your salmon wraps, making them more exciting.

  • Use vegan mayo (vegenaise) for a healthier base
  • Add Sriracha to taste for desired spice level
  • Serving size: 1/2 cup salmon salad per sandwich

Pro tip: Store salad components separately to maintain freshness and prevent sogginess!

Healthy Salmon Sandwich Ideas

Making your salmon sandwich healthy doesn’t mean losing flavor. Salmon is full of omega-3s and protein. It’s great for those who want tasty and nutritious meals.

Healthy Salmon Sandwich Varieties

Looking for lighter options doesn’t mean you have to give up taste. Here are some healthy and tasty ideas for salmon wraps and sandwiches. They’ll keep you full and support your health goals.

Whole Grain and Salmon Sandwich

Try using whole grain bread instead of regular bread. It adds more nutrients and fiber. Here’s a list of ingredients for a healthy salmon sandwich:

  • Whole grain bread or sprouted grain bread
  • Fresh wild-caught salmon
  • Light cream cheese or Greek yogurt spread
  • Fresh herbs like dill or chives
  • Thinly sliced cucumber or radish

Lettuce Wraps with Salmon Salad

Lettuce wraps are a great low-carb option. They’re crisp and refreshing. Use large butter lettuce or romaine leaves as wraps.

  • Mix shredded salmon with light mayonnaise
  • Add chopped celery for crunch
  • Season with lemon juice and fresh herbs
  • Wrap in large lettuce leaves

Low-Calorie Cucumber Salmon Bites

Make elegant and healthy salmon bites for parties or snacks. These small wraps are perfect for any occasion.

  • Use cucumber rounds as a base
  • Top with salmon salad
  • Garnish with microgreens
  • Sprinkle with fresh cracked pepper

These healthy salmon sandwich ideas offer a tasty way to enjoy this nutritious fish. They’re light and delicious, making them perfect for any meal.

Quick Salmon Sandwiches for Busy Days

It’s hard to find time to make a healthy meal when you’re busy. Salmon sandwiches are a quick fix that’s both tasty and nutritious. They’re ideal for a fast, yet fulfilling lunch.

Making a salmon salad sandwich doesn’t have to take long. With the right ingredients and a few smart tips, you can make a meal in minutes.

5-Minute Salmon Salad Strategy

Here’s how to make a quick salmon salad sandwich:

  • Use canned or pre-cooked salmon to save time
  • Chop ingredients fast with a food processor
  • Have pre-mixed seasonings ready for quick flavor
  • Choose bread that’s easy to prepare

Pre-Cooked Salmon: Smart Time-Saving Tips

Choosing the right pre-cooked salmon is key. Look for high-quality canned or vacuum-sealed salmon. Wild-caught salmon usually tastes the best in your sandwiches.

Here’s what makes this meal great:

  • It has about 18 grams of protein per serving
  • It’s full of omega-3 fatty acids
  • It takes only 15 minutes to prepare
  • It serves 4 people

Pro tip: Make your salmon salad ahead of time. Store it in an airtight container. This way, you can have a quick sandwich ready whenever you need it!

Global Flavors: International Salmon Sandwiches

International Salmon Sandwich Varieties

Salmon sandwiches are culinary adventures that span continents. From New York to Scandinavia, these delectable creations showcase the versatility of smoked salmon sandwiches across different cultures. Each region brings its unique twist to this beloved dish, transforming simple ingredients into extraordinary culinary experiences.

New York Classic: Smoked Salmon and Cream Cheese Bagel

The iconic smoked salmon and cream cheese bagel represents a quintessential New York breakfast. Originating from Pacific Northwest Native American smoking techniques, this sandwich combines cold-smoked salmon with rich cream cheese on a traditional bagel. Key preparation tips include:

  • Use 2-3 ounces of cold-smoked salmon per sandwich
  • Choose high-quality cream cheese
  • Select fresh bagels like ciabatta or whole wheat

Southeast Asian Fusion: Vibrant Salmon Wraps

Salmon wraps bring exciting Southeast Asian flavors to your plate. These salmon wraps incorporate ingredients like lemongrass, ginger, and cilantro, creating a light and refreshing meal. The preparation takes just 15 minutes, making it perfect for quick lunches.

Scandinavian Tradition: Open-Faced Salmon Tartine

The Norwegian salmon tartine represents an elegant approach to salmon sandwiches. These open-faced sandwiches feature pickled cucumber and gravlax, showcasing the delicate flavors of Scandinavian cuisine. Pro tip: serve these as sophisticated finger food for gatherings or as an impressive brunch option.

Each global salmon sandwich tells a unique culinary story, bridging traditions and flavors from around the world.

Pairing Your Salmon Sandwich

Improving your salmon sandwich is more than just the sandwich. Adding the right sides and drinks can make it unforgettable. It will excite your taste buds and fill you up.

Finding the perfect sides and drinks for your salmon sandwich is key. You need to match flavors and textures. The right choices will bring out the best in your salmon sandwich.

Perfect Side Dishes for Salmon Sandwiches

Choosing the right side dish can make your salmon sandwich even better. Here are some great options:

  • Crisp garden salads with light vinaigrette
  • Pickled vegetable medleys
  • Kettle-cooked potato chips
  • Fresh cucumber slices
  • Roasted vegetable mix

Beverage Pairings That Elevate Your Meal

Choosing the right drink can make your meal even better. Here are some drinks that pair well:

Beverage Type Flavor Profile Recommended Pairing
White Wine Crisp and Light Sauvignon Blanc
Beer Refreshing Pilsner or Wheat Beer
Non-Alcoholic Cool and Refreshing Iced Green Tea

When picking pairings, look for complementary flavors that match salmon’s natural taste. Light, zesty sides are best with salmon. They make for a balanced and fulfilling meal.

Meal Prep with Salmon Sandwiches

Make meal planning easier with salmon sandwich ideas that save time. Preparing salmon salad sandwiches in advance can change your meal routine. It offers quick and tasty lunch options for your busy days.

Make-Ahead Salmon Salad Strategies

Preparing salmon salad sandwiches ahead of time needs smart planning. Here are some top tips for successful meal prepping:

  • Prepare salmon salad in bulk on weekends
  • Store salmon mixture separately from bread to prevent sogginess
  • Use airtight containers for maximum freshness
  • Keep prepared salmon salad refrigerated for up to 4 days

Storing Salmon Sandwiches for Maximum Freshness

When storing salmon sandwich components, follow these essential guidelines to maintain quality and taste:

  1. Refrigerate salmon salad within 2 hours of preparation
  2. Keep salmon salad in a sealed container at 40°F or below
  3. Separate wet ingredients from bread until ready to eat
  4. Consume refrigerated salmon salad within 3-4 days

Your salmon sandwich meal prep can be both nutritious and convenient. With about 14g of protein per serving and only 145 calories, these make-ahead salmon sandwich ideas are great for health-conscious people looking for quick, tasty meals.

Pro Tip: Use wild-caught canned salmon for an excellent, budget-friendly meal prep protein source!

Kid-Friendly Salmon Sandwich Ideas

Introducing salmon to kids can be tough. But, with fun salmon sandwich ideas, mealtime can be an adventure. Kids love to see what they’re eating, so making salmon sandwiches fun and healthy is important.

Fun Shapes and Themes to Encourage Eating

Make your salmon sandwiches into fun meals that spark kids’ imagination. Try these ideas:

  • Cut sandwiches into animal shapes using cookie cutters
  • Create colorful salmon finger sandwiches with vibrant vegetable additions
  • Make mini sandwich kabobs with bite-sized pieces
  • Decorate plates with smiley faces using sandwich ingredients

Ingredients Kids Will Love

Choose mild flavors that go well with salmon and please kids. Salmon sandwiches are best with creamy textures and soft tastes.

Ingredient Benefits for Kids
Cream Cheese Smooth texture, mild flavor
Honey Natural sweetness
Mild Cheddar Familiar cheese flavor
Cucumber Crisp texture, subtle taste

When making salmon finger sandwiches, make them look good and easy to eat. Use soft whole wheat bread and cut off the crusts. This makes them better to eat and more fun.

Pro tip: Let kids help make the sandwiches. They can pick toppings or help in the kitchen. This makes eating salmon sandwiches fun and interactive.

Tips for Perfecting Your Salmon Sandwich

Making the ultimate salmon sandwich is an art. It mixes creativity with technique. Whether you’re looking for new salmon sandwich ideas or perfecting your salmon salad sandwiches, these tips will help.

To master salmon sandwiches, pay attention to detail and be open to trying new things. Your path to the perfect salmon sandwich starts with learning key preparation techniques and flavor mixes.

Customizing to Your Taste

Personalizing your salmon salad sandwiches is key. Here are ways to make your sandwich uniquely tasty:

  • Try different herbs like dill, chives, or parsley
  • Adjust spice levels with paprika, cayenne, or black pepper
  • Add crunchy bits for texture

Enhancing Texture and Flavor

Texture can turn a simple salmon sandwich into a special meal. Here are ways to boost your sandwich’s texture and taste:

Technique Benefit
Toast bread Adds crunch and prevents sogginess
Layer crisp vegetables Increases nutritional value and texture
Use Greek yogurt Reduces calories by 50%

Pro tip: Mix creamy and crunchy elements well. The best salmon salad has about 1/2 cup of filling per sandwich. This gives you around 22 grams of protein and 145 calories.

Remember, making the perfect salmon sandwich is a personal journey. Don’t be shy to try new things and find your own flavor!

Conclusion: Enjoy Your Salmon Sandwich Creations!

Your journey through salmon sandwich ideas has shown how versatile this protein is. From classic to creative international twists, salmon sandwiches are endless. Whether for a quick lunch or elegant tea sandwiches, the options are amazing.

Salmon sandwiches are all about trying new things. You can use different breads and flavors to match your taste. With 2½ ounces of smoked salmon per sandwich, you get great taste and nutrition.

Experimenting with New Ingredients

Get creative with your salmon sandwich ideas. Add pickled veggies, unique spreads, or spices from around the world. These sandwiches are quick to make, perfect for a fast, tasty meal. Your kitchen is a place to explore and have fun with salmon as your base.

Sharing Your Favorite Combinations

We want you to share your best salmon sandwich ideas with others. Your unique take on salmon tea sandwiches could inspire someone else. Cooking is about trying new things, adapting, and sharing great food with others.

FAQ

How long does it take to make a salmon salad sandwich?

Making a salmon salad sandwich is quick. It takes just 5 minutes. This makes it perfect for those with busy schedules. Using pre-cooked or canned salmon saves time without losing flavor or nutrition.

What type of bread works best for salmon sandwiches?

The right bread for salmon sandwiches is up to you. Whole grain, sourdough, bagels, and croissants are great choices. Pick a bread that matches the salmon’s taste and adds a nice texture.

Are salmon sandwiches healthy?

Salmon sandwiches can be very healthy. Salmon is full of omega-3s, protein, and nutrients. Use whole grain bread, add veggies, and choose Greek yogurt for a lighter spread.

Can I make salmon sandwiches in advance?

Yes, you can make salmon salad ahead of time. It keeps in the fridge for 3-4 days. Keep the salad and bread separate to avoid soggy sandwiches.

How can I make salmon sandwiches more kid-friendly?

To make salmon sandwiches fun for kids, cut them into shapes or use mild cream cheese. Add a bit of honey or make finger sandwiches. Letting kids help can make them more excited.

What are some international salmon sandwich variations?

Try different flavors like a New York-style smoked salmon bagel or a Southeast Asian salmon wrap. You can also make a Norwegian smørbrød for a unique taste.

Can I make a low-carb salmon sandwich?

Yes! Use lettuce wraps, cucumber rounds, or bell peppers instead of bread. These options are low in carbs but still delicious.

What sides pair well with salmon sandwiches?

Pair salmon sandwiches with light salads, pickled veggies, or crisp chips. Fresh cucumber slices are also great. For drinks, try white wine, sparkling water, or herbal iced tea.

How can I add more flavor to my salmon salad?

Add herbs like dill or chives, or spices like smoked paprika. Capers, finely chopped red onion, and lemon juice can also enhance the flavor.

Are canned salmon sandwiches as good as fresh salmon?

Canned salmon is a great, easy alternative to fresh. Choose high-quality, wild-caught options and drain them well. This makes for a tasty and nutritious sandwich.


By:

March 5, 2025

salmon poke bowl

The first time I tasted a salmon poke bowl, it was a culinary revelation. The colors, fresh ingredients, and bold flavors took me to Hawaii’s beaches. This simple fisherman’s meal has become a global hit, letting home cooks make Hawaiian dishes at home.

Salmon poke bowls are more than food; they celebrate fresh ingredients, cultural mix, and creativity. Whether you’re an experienced chef or just starting, making a salmon poke bowl is simple.

This guide will teach you to make a delicious salmon poke bowl. You’ll learn about choosing the right salmon, making marinades, and adding toppings. Soon, you’ll be making Hawaiian dishes that impress everyone.

Understanding the Origins and Essence of Hawaiian Poke

Poke is a dish loved from Hawaiian cuisine, with a history that goes back generations. It started as a simple snack for local fishermen. Now, it’s a global food sensation.

In the late 1920s, Japanese immigrants, who were about 40% of Hawaii’s people, helped shape poke. Ahi tuna was the main fish used, giving poke its unique taste.

Traditional Hawaiian Poke Elements

Traditional poke was a way for fishermen to enjoy their fresh catch. It included:

    • Raw ahi tuna cut into cubes

    • Sea salt

    • Seaweed

    • Crushed roasted candlenut

Evolution of Modern Poke Bowls

Poke has changed from a simple dish to a customizable meal. Ahi tuna is still popular, but salmon is also loved for its buttery taste.

Cultural Significance and Global Popularity

In the 2010s, poke became a global trend. Social media like Instagram helped spread its fame, showing off its colors and health benefits.

Poke is more than a meal—it’s a cultural symbol of Hawaii’s diverse food heritage.

Poke is loved worldwide for its protein, omega-3s, and easy to make. It celebrates Hawaiian cuisine’s rich traditions.

Essential Ingredients for the Perfect Salmon Poke Bowl

Making a tasty salmon poke bowl starts with picking top-notch ingredients. These ingredients add flavor and health to your meal. You’ll learn about the key parts that make a simple dish into a delicious one.

The base of a great poke bowl is key. Sushi rice is the classic choice, offering a sticky and sweet base. If you want something different, you can try:

    • Cauliflower rice for a low-carb option

    • Jasmine rice for a fragrant twist

    • Short-grain brown rice for added nutrition

Fresh veggies are important for a good poke bowl. Avocado adds creaminess and healthy fats. Seaweed salad brings a unique ocean flavor and a crunchy texture. These add to the taste and health benefits.

When putting your bowl together, keep these ingredients in mind:

    1. 8 ounces of sushi-grade salmon

    1. 1/2 cup diced avocado

    1. 1/4 cup seaweed salad

    1. 2 tablespoons chopped green onions

    1. 2 teaspoons toasted sesame seeds

The beauty of a poke bowl is its flexibility. You can try new ingredients while keeping the dish’s spirit. Your creativity can turn a simple recipe into a unique dish.

Selecting and Preparing Sushi-Grade Salmon

Making a great salmon poke bowl begins with picking the best salmon. The quality of your fish is key. So, it’s important to know how to choose and prepare sushi-grade salmon.

Choosing Quality Sushi-Grade Salmon

Look for these traits when picking salmon for your poke bowl:

    • Vibrant, bright color with no discoloration

    • Firm, glossy flesh

    • Mild ocean scent (no strong fishy odor)

    • Sourced from reputable fishmongers

Wild-caught salmon like sockeye and king salmon are best. They have a better texture and taste in a salmon poke bowl.

Proper Storage and Handling

Sushi-grade salmon needs careful handling for safety. Keep it refrigerated and eat it fast after buying. Always use clean tools and surfaces when making a salmon poke bowl.

Salmon Type Recommended Quantity Preparation Time
Sushi-Grade Salmon 8 ounces 15-20 minutes

Cutting Techniques for Perfect Cubes

For the best salmon poke bowl, cut your fish right:

    1. Use a sharp, clean knife

    1. Slice against the grain

    1. Create uniform ½-inch cubes

    1. Keep salmon chilled during cutting

Pro tip: Freezing salmon for 15 minutes before cutting makes for cleaner cuts in your salmon poke bowl.

Creating the Perfect Poke Bowl Base

The base of a great poke bowl is key. Sushi rice is the top choice, offering a sticky texture that keeps everything in place.

To make sushi rice for your poke bowl, follow these steps:

    • Rinse rice well to get rid of extra starch

    • Use a 1:1.2 rice to water ratio for the right feel

    • Let rice cool a bit before mixing to keep salmon’s texture

But sushi rice isn’t your only choice. There are bases for every diet:

Base Option Nutritional Benefit Dietary Consideration
Sushi Rice Traditional, high carbohydrate Standard option
Quinoa High protein, gluten-free Health-conscious choice
Brown Rice More fiber, complex carbohydrates Whole grain alternative
Cauliflower Rice Low-carb, vegetable-based Keto and low-carb diets

Pro tip: Try different bases to find your favorite poke bowl base!

“The right base turns a good poke bowl into a memorable meal.” – Hawaiian Poke Master

Mastering the Marinade for Your Salmon Poke

Creating the perfect marinade is key to making your salmon poke amazing. The right mix of flavors can turn your dish into a true culinary journey.

A classic marinade enhances your salmon, adding depth and character. It’s all about finding the right balance of flavors that match the fish’s rich, delicate taste.

Classic Soy-Based Marinade Foundation

Your marinade should start with:

    • High-quality soy sauce

    • Sesame oil

    • Rice vinegar

    • A touch of honey for sweetness

Yuzu Ponzu Dressing Variation

For a citrusy twist, try a yuzu ponzu dressing. It adds a tangy, refreshing touch that balances the fish’s richness.

Ingredient Quantity Purpose
Yuzu juice 2 tablespoons Citrus base
Soy sauce 1 tablespoon Umami depth
Mirin 1 teaspoon Sweet balance

Marinating Guidelines

When marinating salmon for poke, timing is crucial. Aim for 15-30 minutes to avoid over-salting or mushiness. Keep it refrigerated and maintain a consistent temperature.

“The secret to great poke is respecting the fish’s delicate nature while maximizing flavor.” – Hawaiian Culinary Tradition

Play with your yuzu ponzu dressing and marinade ratios to achieve the perfect balance. Every tweak brings you closer to creating the ultimate poke.

Fresh Toppings and Texture Components

Creating a memorable salmon poke bowl is more than just the fish. The right toppings make your dish stand out. They add layers of flavor and exciting textures that make your taste buds happy.

Start with creamy avocado, a key poke bowl ingredient. Cut into 1/2-inch dice, avocado adds a rich, buttery taste that goes well with the salmon. Use about 3/4 of an avocado per serving for the best balance.

    • Seaweed salad: Brings a unique oceanic crunch

    • Macadamia nuts: Add a delightful Hawaiian-inspired crispness

    • Cucumber: Provides refreshing coolness

    • Radishes: Offer a peppery bite

Think about these toppings to make your dish more exciting:

    1. Crunchy elements: Macadamia nuts, toasted sesame seeds

    1. Soft components: Avocado, edamame

    1. Crisp additions: Cucumber, watermelon radish

Pro tip: To keep avocado from browning, add a splash of lime juice and store it in an airtight container. Your toppings should not only taste amazing but also make your bowl look stunning. It should be as Instagram-worthy as it is tasty.

Crafting Complementary Sauces and Dressings

Take your salmon poke bowl to the next level with the right sauce. The perfect dressing can add depth and excitement to every bite.

Traditional Ponzu and Spicy Mayo Foundations

Begin with classic sauces for authentic flavor. Yuzu ponzu dressing adds a bright, citrusy taste that balances the rich salmon. Its tanginess refreshes the dish.

    • Classic ponzu: Citrus-infused soy sauce

    • Spicy mayo: Creamy with a kick of heat

    • Yuzu ponzu dressing: Zesty and light

Innovative Sauce Combinations

Try unique sauce blends to show off your creativity. Mix traditional flavors with new twists for a personalized taste.

    • Sesame-ginger blend

    • Chili-infused coconut sauce

    • Miso-citrus fusion

Balancing Flavors and Heat Levels

Creating sauces is about finding the right balance. Adjust your yuzu ponzu dressing with chili sauce or sweetener to your liking.

Pro tip: Start with small amounts of spicy ingredients and taste as you go!

Assembly Techniques for Instagram-Worthy Presentation

Making a stunning salmon poke bowl is more than just mixing ingredients. Choose a wide, shallow bowl to show off your colors. Start with quinoa or sushi rice as the base. Then, arrange the marinated salmon to add depth and interest.

Place your toppings to highlight color and texture. Add toasted sesame seeds for a professional look and nutty taste. Dice avocado and scatter green onions for freshness and color. Aim for a balanced look that’s as tasty as it is pretty.

Get creative with garnishes like seaweed salad, edamame, or crispy wontons. This dish is all about flexibility, so pick toppings that you love. A well-made poke bowl tells a story, showing off its beauty and taste.

Finish with a drizzle of sauce and a sprinkle of sesame seeds. Your poke bowl is now ready for photos, sharing, and enjoying.

FAQ

What exactly is a poke bowl?

A poke bowl is a dish from Hawaii. It has cubed raw fish like salmon or tuna. It’s served over sushi rice with toppings and sauces. It’s a healthy meal that you can make your own way.

Is salmon poke safe to eat raw?

Yes, but only use sushi-grade salmon. This fish is frozen to kill parasites. Buy it from trusted places and handle it safely.

Can I make a poke bowl if I’m vegetarian?

Yes! You can use tofu, tempeh, or roasted veggies instead of fish. It’s a tasty way to enjoy a plant-based poke bowl.

How long can I store a prepared poke bowl?

Eat your poke bowl right away for the best taste. If you must store it, keep parts separate in the fridge for 24 hours. This keeps everything fresh.

What are some traditional poke bowl toppings?

Try avocado, seaweed salad, edamame, pickled veggies, sesame seeds, and macadamia nuts. They add flavor and texture to your poke bowl.

Can I use a different type of fish instead of salmon?

Yes! Salmon is popular, but tuna is also great. You can also try yellowtail, snapper, or trout. Make sure the fish is sushi-grade and fresh.

What type of rice works best for poke bowls?

Sushi rice is traditional, but you can use brown rice, quinoa, or greens. Choose something that goes well with the fish and marinade.

How spicy can I make my poke bowl?

Make it spicy with sriracha, wasabi, or chili oil. Start with a little and add more if you like it hotter.

Are poke bowls a healthy meal option?

Poke bowls are nutritious. They have protein, healthy fats, and lots of veggies. They’re low in calories and customizable for any diet.

What’s the best sauce for a salmon poke bowl?

Yuzu ponzu dressing is a great choice. It’s citrusy and pairs well with salmon. You can also try soy sauce, spicy mayo, or sesame-ginger dressing.

By:

March 4, 2025

shrimp burrito bowl

Want a tasty shrimp burrito recipe that brings Mexican flavors to your kitchen? The shrimp burrito bowl is a mix of fresh ingredients, bold seasonings, and good nutrition. It turns burrito flavors into a flexible, easy meal for everyone.

This dish will become your favorite, mixing tasty seafood with Mexican spices. It’s perfect for a quick dinner or a casual party. You’ll enjoy a top-notch meal without leaving your house.

Key Takeaways

    • Discover an easy, flavorful Mexican-inspired seafood dish

    • Learn to create restaurant-quality meals at home

    • Explore versatile and customizable recipe options

    • Enjoy a balanced, nutritious meal in under 30 minutes

    • Master authentic Mexican cooking techniques

Essential Ingredients for the Perfect Shrimp Burrito Bowl

Making a great chicken and shrimp burrito bowl is all about picking the right ingredients. It’s not just a meal; it’s a journey of flavors. You’ll mix fresh seafood, lively spices, and tasty parts together.

Fresh Seafood Selection Tips

Here’s how to pick the best shrimp for your burrito bowl:

    • Bright, translucent appearance

    • Firm texture without dark spots

    • Clean, mild ocean scent

    • Avoid any fishy or ammonia-like odors

Must-Have Mexican Seasonings

Use these authentic Mexican spices to spice up your burrito bowl:

    • Cumin – adds earthy warmth

    • Chili powder – provides subtle heat

    • Smoked paprika

    • Fresh cilantro

    • Garlic powder

Base Components and Toppings

Start with these key ingredients for a solid burrito bowl:

    1. Cilantro-lime rice

    1. Black or pinto beans

    1. Roasted corn

    1. Diced tomatoes

    1. Sliced avocado

Pro tip: Mix proteins like shrimp and chicken for a more exciting burrito bowl.

Preparing Your Authentic Shrimp Burrito Components

Making a tasty baja shrimp burrito bowl begins with preparing each ingredient carefully. Your aim is to create layers of flavor that highlight the main attraction – the shrimp. Let’s explore the key components that will elevate your meal from good to great.

Rice is the base of your burrito bowl. Opt for long-grain white or brown rice for the best texture. Here’s a simple guide to cooking rice perfectly:

    • Rinse rice well to remove extra starch

    • Use a 2:1 water to rice ratio

    • Add a pinch of salt for extra flavor

    • Cook until it’s fluffy and light

To enjoy a true baja shrimp burrito, add some vibrant toppings. Consider these fresh options:

    • Pico de gallo with diced tomatoes, onions, and cilantro

    • Creamy guacamole

    • Tangy cabbage slaw

    • Black or pinto beans

Ingredient Prep Time Storage Tips
Rice 15 minutes Refrigerate up to 4 days
Pico de Gallo 10 minutes Best fresh, store 2 days
Guacamole 15 minutes Add lime to prevent browning

Preparation is crucial for a smooth cooking experience. Chop veggies, cook rice, and prep beans ahead of time. This method saves time and ensures your baja shrimp burrito bowl is ready quickly when you’re hungry.

Mastering the Art of Seasoning and Cooking Shrimp

Creating the perfect grilled shrimp burrito begins with mastering shrimp preparation and cooking. The right methods can turn simple seafood into a delicious highlight of your dish.

Marination Magic for Flavorful Shrimp

Marinating is key to adding amazing flavor to your shrimp. Mix together:

    • Fresh lime juice

    • Minced garlic

    • Olive oil

    • Chili powder

    • Cilantro

Let the shrimp soak in these flavors for 15-30 minutes before cooking. This helps them absorb all the taste.

Nailing the Cooking Temperature

For a great grilled shrimp burrito, controlling the temperature is essential. Cook at medium-high heat, around 375-400°F. This gives a nice char without making the shrimp tough.

Achieving Shrimp Perfection

When grilling shrimp for your burrito, look for these signs of doneness:

    1. Shrimp turns opaque pink

    1. Meat becomes firm

    1. Shape curls into a “C”

Cooking time is usually 2-3 minutes per side. Avoid overcooking, as it makes shrimp tough and dry, ruining your burrito.

Building Your Bowl: Assembly and Presentation

Making the perfect shrimp burrito bowl is like creating a work of art. It’s all about layering and presentation. Your bowl should be a feast for the eyes, with colors, flavors, and textures that pop.

First, pick a solid base for your shrimp burrito bowl. You can choose from:

    • Cilantro-lime rice

    • Cauliflower rice

    • Mixed salad greens

    • Quinoa

Now, let’s talk about how to put it all together. Follow this simple layering guide:

    1. Start with your base layer

    1. Add seasoned black beans or corn

    1. Place your perfectly cooked shrimp

    1. Sprinkle fresh toppings

Don’t forget, looks matter as much as taste. Arrange your ingredients in neat sections. This makes each bite a delight and works great for both one person or a whole family.

Layer Recommended Ingredients Purpose
Base Rice/Greens Foundation of the bowl
Protein Seasoned Shrimp Primary flavor driver
Extras Avocado, Salsa Added texture and freshness

Pro tip: Keep ingredients slightly separated. This lets each flavor shine and lets everyone customize their bowl.

Tips for Making Restaurant-Style Shrimp Burrito Bowls at Home

Making restaurant-quality chicken and shrimp burrito bowls at home is easier than you think. With a few smart strategies, you can make your home cooking taste like your favorite Mexican restaurant.

Time-Saving Prep Methods

Preparing a baja shrimp burrito doesn’t have to take a lot of time. Try these efficient techniques to make your cooking faster:

    • Batch prepare proteins in advance

    • Use pre-chopped vegetables

    • Keep essential seasonings in ready-to-use containers

    • Invest in quality meal prep containers

Storage and Meal Prep Solutions

Maximize your chicken and shrimp burrito bowl preparation with smart storage techniques:

Component Refrigeration Time Best Storage Method
Cooked Shrimp 3-4 days Airtight container
Rice Base 5-7 days Sealed glass container
Chopped Vegetables 2-3 days Separate compartment containers

Customization Options

Transform your baja shrimp burrito bowl by experimenting with these exciting variations:

    1. Mix protein types for varied flavors

    1. Explore different grain bases

    1. Add unique sauce combinations

    1. Incorporate international spice blends

Pro tip: Always keep your ingredients fresh and experiment with new flavor profiles to keep your burrito bowls exciting and delicious!

Conclusion

Making a grilled shrimp burrito bowl at home is more than just a meal. It’s a chance to dive into Mexican-inspired cuisine with creativity. You’ve learned how to pick ingredients, season shrimp, and make a bowl full of flavor.

The shrimp burrito bowl is very versatile. You can make it spicy or mild, with lots of toppings or just a few. It’s a protein-rich, quick meal that doesn’t need much cooking skill.

You now have the power to try new ingredients, seasonings, and ways to present your dish. Invite friends and family to try your version of this vibrant dish. Remember, the more you make it, the better you’ll get at it.

Enjoy your grilled shrimp burrito bowl with a crisp margarita or a refreshing agua fresca. Don’t be shy to add your own twist to the recipe. Cooking is all about expressing yourself and having fun.

FAQ

What type of shrimp works best for a burrito bowl?

Choose large or extra-large raw shrimp (16-20 count) for the best results. Wild-caught Gulf shrimp or Mexican white shrimp taste great. Look for shrimp that are firm, have a slight shine, and smell fresh.

Peeled and deveined shrimp save you time and are perfect for quick meals.

How can I make my shrimp burrito bowl spicy?

Add heat by using jalapeños in your pico de gallo or chipotle powder in your seasoning. You can also add hot sauce or diced serrano peppers. Start with small amounts and adjust to your taste.

Can I prepare a shrimp burrito bowl in advance?

Yes, you can prep parts up to 2-3 days ahead. Cook rice and beans, chop veggies, and make marinades early. Keep shrimp raw until just before cooking.

Store parts in airtight containers in the fridge. Assemble just before eating.

What are some alternative proteins if I don’t want shrimp?

Try grilled chicken, carne asada, black beans, or tofu. Season them like the shrimp marinade. Mixing chicken and shrimp adds variety and nutrition.

How do I prevent my shrimp from becoming rubbery?

Cook shrimp quickly over high heat. Remove them when they turn opaque and pink. This takes 2-3 minutes per side.

Avoid overcooking. Use a marinade to keep shrimp tender. Grill at medium-high heat and watch closely.

Are shrimp burrito bowls healthy?

Shrimp burrito bowls can be healthy. Shrimp are high in protein and low in calories. Choose brown rice, add lots of veggies, and use lean proteins.

Limit high-calorie toppings like sour cream and cheese.

What’s the difference between a Baja-style and traditional shrimp burrito bowl?

Baja-style bowls have lighter, brighter flavors. They include cabbage slaw, lime crema, and grilled or crispy shrimp. Traditional bowls have deeper, more complex flavors.

They often have adobo seasoning and a variety of beans and rice.


By:

March 2, 2025

marry me salmon

Get ready to fall in love with this romantic dinner recipe. Marry Me Salmon has become a hit in home kitchens. It turns a simple seafood dish into a magical meal that wows everyone.

This recipe combines rich flavors with an elegant look. It’s so good, it might even spark a marriage proposal.

Imagine making a restaurant-quality meal in just 30 minutes. Your dinner guests will be amazed. The secret is the creamy sun-dried tomato sauce. It makes this salmon dish go from simple to spectacular.

Whether it’s for a romantic date night or a surprise for your partner, this recipe is a sure win. It guarantees a culinary success that will impress everyone.

Key Takeaways


    • Easy 30-minute gourmet salmon recipe

    • Creamy sun-dried tomato sauce creates irresistible flavor

    • Perfect for romantic dinners and special occasions

    • Restaurant-quality meal prepared at home

    • Requires minimal cooking skills

    • Impressive dish with potential proposal-worthy appeal

Understanding Marry Me Salmon: The Ultimate Date Night Dish

Exploring new ways to cook fresh salmon can change your cooking game. The Marry Me Salmon is a legendary dish that wins hearts and taste buds. It offers a unique twist on cooking salmon, unlike traditional recipes.

This dish creates a memorable dining experience. It turns cooking fresh salmon into an exciting journey. It’s a favorite among home cooks and food lovers.

Origins of the Culinary Romance

The creator of the marry me salmon is unknown, but its concept is brilliant. It combines flavors that touch the heart. Food bloggers and home chefs have shared their versions, making it special.


    • Originated from creative home cooking experiments

    • Gained popularity through social media sharing

    • Became a viral sensation for romantic dinners

The Romantic Backstory

The dish got its name from stories of successful romantic moments. Legend has it that the rich sauce and salmon create a delightful experience. It might even inspire a marriage proposal.

Essential Ingredients Spotlight

To make this magical dish, you need top-quality ingredients:


    1. Fresh salmon fillet

    1. Sun-dried tomatoes

    1. Heavy cream

    1. Garlic and herbs

    1. Parmesan cheese

Planning a special date night or want to impress your loved ones? The Marry Me Salmon is perfect. It combines flavor, romance, and creativity, making any meal special.

Kitchen Tools and Ingredient Preparation Guide

To make a tasty marry me salmon pasta recipe, you need the right tools and ingredients. Your kitchen setup is crucial for this romantic dish. Let’s explore the essential equipment and preparation techniques.

Must-Have Kitchen Tools


    • Large non-stick skillet

    • Sharp chef’s knife

    • Cutting board

    • Measuring cups and spoons

    • Wooden spoon or silicone spatula

    • Colander for pasta

Choosing fresh salmon is vital for your dish. Look for bright, firm flesh without a strong fishy smell. Wild-caught salmon is the best choice for flavor and nutrition.

Ingredient Preparation Techniques


    1. Rinse salmon under cold water

    1. Pat dry with paper towels

    1. Remove any visible bones

    1. Cut salmon into even 1-inch pieces

Proper sun-dried tomato preparation is key. Choose oil-packed varieties for the best flavor. Drain and chop them finely to spread their rich taste evenly.

Ingredient Preparation Tip Quantity
Salmon Remove skin, cut into uniform pieces 1 pound
Sun-Dried Tomatoes Drain, chop finely 1/2 cup
Pasta Cook al dente 12 ounces

Pro tip: Always have all ingredients prepped before you start cooking to ensure a smooth, stress-free cooking experience.

Perfect Creamy Sun-Dried Tomato Sauce Technique

Making a great sun-dried tomato sauce can turn simple salmon recipes into amazing dishes. It’s all about finding the right mix of flavors and textures. This makes your meal go from good to great.

To make the perfect sauce, you need to be precise. You want a creamy base that brings out the salmon’s taste. Choose top-notch sun-dried tomatoes and pick your cream and spices wisely for the best flavor.

Achieving the Perfect Sauce Consistency

Getting the sauce just right is key. Start by cooking minced garlic in butter. This gives your sauce a rich start. Then, slowly add cream while whisking to keep it smooth and creamy.

Sauce Flavor Enhancement Tips

Layering flavors is important in making sauces. Try adding white wine or red pepper flakes for depth. Fresh herbs like basil or thyme can make your sauce unforgettable.

Common Sauce Making Mistakes to Avoid

Don’t let your sauce get too hot, as it can break or become grainy. Keep the heat low and stir often. Taste and adjust your seasonings slowly. Remember, you can always add more, but you can’t take away.

FAQ

What makes Marry Me Salmon so special?

Marry Me Salmon is famous for its creamy sun-dried tomato sauce and perfectly cooked salmon. It’s so tasty, it might even inspire marriage proposals. You can make this dish at home in just 30 minutes, thanks to its restaurant-quality taste and presentation.

What kind of recipes can I make with fresh salmon?

Fresh salmon is super versatile. You can make Marry Me Salmon, salmon pasta, or even salmon poke bowls. Try different marinades and cooking methods to create amazing dishes. The key is to use high-quality, fresh fish.

How difficult is it to make the creamy sun-dried tomato sauce?

Making the sauce is easier than it sounds. Use fresh ingredients and sauté your garlic carefully. Slowly add cream and seasonings to get the right consistency. With practice, you’ll make a sauce that’s just like in a restaurant.

Can I substitute ingredients in the Marry Me Salmon recipe?

Yes, you can! Customize the recipe by changing the fish, herbs, or sauce. For a lighter version, use Greek yogurt instead of heavy cream. You can also swap sun-dried tomatoes for roasted red peppers. The recipe is very flexible and allows for your personal touch.

Is Marry Me Salmon suitable for a romantic dinner?

Absolutely! This dish is perfect for a romantic dinner. Its elegant presentation and tender salmon with creamy sauce make it impressive and delicious. It’s ideal for date nights or special occasions.

How long does it take to prepare Marry Me Salmon?

This recipe is quick to prepare. You can have it ready in about 30 minutes. It’s great for weeknight dinners or special occasions when you want a gourmet meal fast.

What are some recommended side dishes for Marry Me Salmon?

Good side dishes include roasted asparagus, garlic herb rice, or creamy mashed potatoes. Choose sides that complement the sauce without overpowering the salmon. A light arugula salad or roasted Brussels sprouts also work well.